You know, now that I think about it, I actually finished tying onto the back beam on the first day. It's all a blur. Three days of intensive weaving will do that to your brain.
 |
| Untying and retying knots is pretty much the name of the game in weaving. |
The bulk of the waste in weaving happens at the end of the warp, because you need enough give to separate the warp threads enough for your shuttle to pass through the shed, and you need enough length to pass the threads from the back apron rod (the stick they're attached to at the back of the loom),
through the guts of the loom, to the side you're working on. As a result, you can use whatever type of knot you want at the back (to an extent). The few inches you'll lose by cutting off the warp at the end of the weaving won't affect your finished yardage or fringe length in any appreciable way.
 |
| Sooooo many knots. |
That said, don't change the type of knot you're tying. The overall warp length needs to be as consistent as possible across the width of the cloth, or you'll end up losing a significant amount when you try to tie on at the
front of the loom, and you're limited to the length of the shortest warp thread. (This is also why measuring in chunks is a good idea—the first layer of warp on the warping board will be the shortest, and every successive layer will just waste more yarn. Make lots of warp chains rather than one monstrous but inconsistent one.)
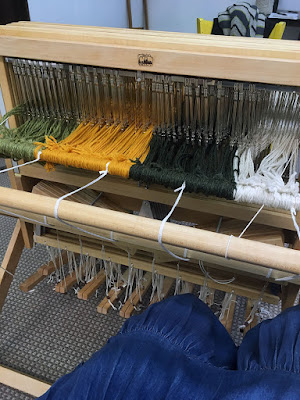
As for tying onto a stick that's itself tied to the actual back beam...it saves about a yard of warp! And tying directly onto the back beam would be a yoga exercise—note that it's by my knees in the photo above, and I'm sitting on a pretty low stool.
 |
| The yellow and white aren't completely unchained yet—I wasn't that far off in measuring. |
This (I think) is where my second day actually started—winding on! We left the lease sticks in for this step, though you don't have to, and weavers have Strong Opinions about the use or non-use of lease sticks. On the one hand, keeping them in ensures that all the warp threads stay in sequence—the lease sticks are still holding the cross in place from winding the warp—but on the other, they add a
lot of tension and friction to the process, which can be pretty hard on the warp.
Sticks or no sticks, winding on does require a certain amount of tension on the warp, and some snapping (like you're a Hollywood star in a Western, urging your horse to go faster) and thrumming (same movie, but now you're playing sad guitar music) to sort out tangles without creating further tangles downstream.
We used cardboard to separate the layers of warp as we wound on; warp threads can otherwise squish and fall between lower layers, which makes each thread wind on at a slightly different length and tension, and spells disaster for the cloth.
 |
| Wool is GRABBY. |
When nearly all the warp was wound on, I got to snip the loops at the near end, and slip the lease sticks out. Theoretically. In practice there was a bit more yanking and untangling by hand; after sliding three yards of crossed wool through the tiny gap between lease sticks, some of my warp had all but felted together around the second stick.
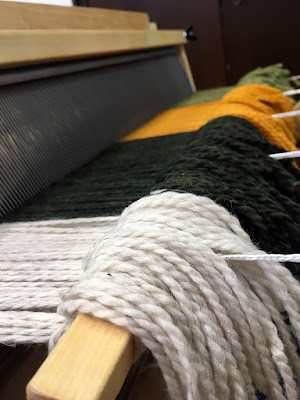 |
| There are so many aspect of weaving that are really satisfying to a pattern-driven mind. |
Tying on at the front of the loom is a two-step process. First, you tie bouts of about half an inch of warp each onto the front apron rod with a half-knot. Once all the warp threads are attached, you go back through them from end to end, grabbing the tails of each knot and pulling them up (toward the loom/away from yourself) to tension the warp. When everything's tensioned and you've run your hand over the warp to check that each bout matches the others, you can tie bows or knots to finish anchoring the warp.
 |
| SO. CLOSE. TO. WEAVING. |
Like this! I used half-bows, because my warp ends were actually pretty short for the thickness of the strands, and because the shapes they made were satisfying. This also worked out well for me when I started weaving, because the tails and loops cushioned the knots enough to even out the fabric as it wound onto the cloth beam, so I didn't have to worry about putting cardboard in the front.


Comments
Post a Comment