No, really. Junk mail has been fantastic for making the first few hundred of the thousands of little templates I need for this project. Typically, to work English paper piecing, you'd make a few dozen templates, prep them with fabric, and start stitching pieces together. Every time a piece was seamed to its neighbors on all sides, you'd pop the template out and reuse it.
I'm not doing that because
I'm a glutton for punishment I have a
lot of different fabric patterns and tones, and I want to be able to play with the arrangement to get as random a pattern as possible before I stitch everything together. So I need to prep all my pieces before I start sewing.
 |
| I'm going to forget about that first hexi and be deeply annoyed by it in several months. |
The first hexagon I prepped, I tried stitching through the template to baste the fabric in place. It certainly made nice sharp corners, but I could tell that it'd wear out my hands and needles much faster than I cared for. So I figured out how to baste hexis to templates without actually passing the needle through the template at all—and as a bonus, this way I won't have to go back to snip all my basting threads and remove them once I've sewn my pieces together, either.
 |
| Featuring the first spool of thread to bite the dust. Definitely not the last. |
Step one: lay out all the bits and bobs, and center (or mostly center; the fabric for this one was the edge of the fat quarter, so it has a longer tail) a paper template on the back of the fabric. I saw lots of notes in tutorials about how your cutting doesn't have to be even, don't worry, that's what the template is for, you can even use precut squares. If that's your thing, by all means, have at it! I get twitchy about the amount of waste involved in most of the quick'n'easy ways to produce hexagons from square pieces of fabric, so I'm hand cutting my fabric into pieces with just enough seam allowance to work.
 |
| More centered is better, but my cutting isn't exact either. |
Step two: change hexis, because you forgot you were taking step-by-step photos. Pin the paper template to the fabric, in the middle. I learned later that I got stabbed less when I oriented the pin along the point-to-point axis, so...do that, instead of the edge-to-edge I took a photo of.
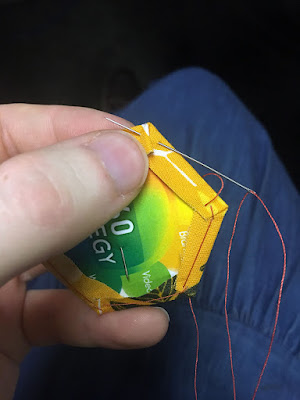 |
| Fold and pinch and stitch, fold and pinch and stitch, all the way around. |
Step three: fold the fabric over one edge, then smooth the next side over the adjacent edge, tucking the corner so it's all neatly folded. Stitch through the fold (I've just been leaving inch-long tails at the beginning and end of my basting, and haven't had any trouble with the stitches pulling out), then stitch through the same fold again—that's what anchors the corner. Carry on all the way around. Try not to stab yourself when you're doing the edges the pin is pointing at.
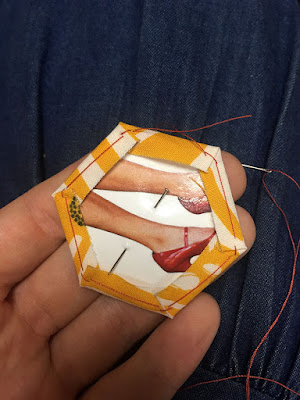 |
| Sorry for the voodoo doll imagery. |
Step four: look, step by step is not my normal mode at all, just pretend I've been consistent with the hexagon in progress throughout. Cut the thread tail, pull out the pin (I only use one, so I'm not tempted to pin a bunch of hexis at once and forget to pull the pins after I've basted), stack the hexi with its friends.
Repeat...forever.


Comments
Post a Comment