A brief reminder: portions of this blog are primarily for my reference...like this series of posts, which are going to be photo-heavy and stuffed with all the technical information I can remember from the double weave class I took at the
Yarn Barn last weekend. (I'm hilarious, so it's still worth reading! But we'll also still be friends if you sit these ones out.)
So! I took a double weave class! It was
wicked. And slightly challenging, because I realized later that it's been two years since the last time I set up or worked on a multi-harness loom. No wonder I couldn't remember much of the vocab, though I knew how to do most of the tasks.
 |
| Those cakes are as big as my head, no joke. |
We started with a brief overview of how double weave works: it's a way to extend the width of your loom, or to create two-sided cloth (or you can make pockets and pouches on the loom. It's very versatile). For plain weave cloth (over-under-over-under), you have to have at least four harnesses on the loom, so you can have up and down positions for the warp threads of the upper layer
and up and down positions for the warp threads of the lower layer. More harnesses would let you set up for twills or other more complex structures; you'd just have to remember that the lower layer of cloth is in the opposite orientation to the upper. We were making plain weave blankets in class, twice as wide as the weaving width of our looms—no interchanging the layers of cloth to make pockets this time.
I know I've mentioned being a small person before (technically I'm dead average by height, but...there are a lot of tall people around, I guess), but I
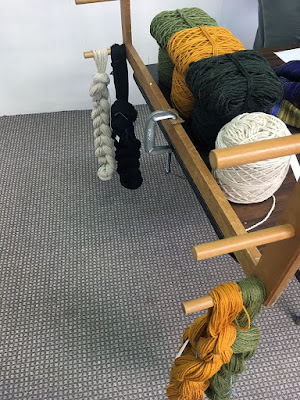
love oversized things. Having seven giant skeins of yarn already wound, that I didn't have to spend days winding, was DELIGHTFUL. Also, they're huge; I chose Cascade Eco+ for my blanket, which comes in 478-yard skeins.
 |
| I was trying not to take inadvertent portraits of everyone else in class. |
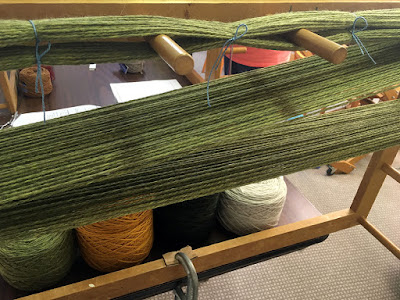
We wound the warp for both layers of cloth at once, one section at a time (the blankets ended up about five feet wide, and we're using worsted-to-bulky weight yarn). Since mine was going to be big mirrored stripes, I didn't have to fuss with winding different colors in exactly the right order—another woman decided to try asymmetrical stripes, which looked lovely, but was much more challenging to wind.
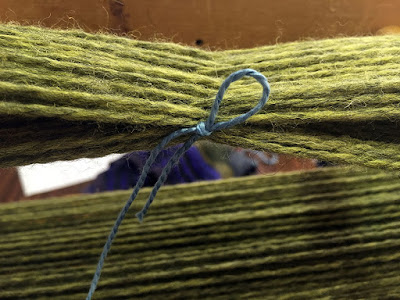 |
| The most crucial bow. |
The cross formed on the warping board is critical to keeping everything in order, which makes winding the warp onto the loom much easier later. Twisted or out-of-order threads tangle, and they can also be wildly different lengths, depending on how much they wandered from their intended position. So we tied the cross itself, and each of the legs—that's mostly for extra security, and to make separating the layers of threads easier.
 |
| Perspective is a bugger. Those chains of warp are huge. |
I wound 120 ends of light green, gold, and dark green, and 60 of white—the white warp stripe is the pivot point of the pattern, so I only needed one stripe's worth of warp for it. All the other chains have ends for two stripes, one on the top layer of fabric and one on the bottom.
I didn't get photos of it, but we laced the lease sticks to one side of the loom, slid each of the chains in order from edge to middle onto the sticks, with the cross in the space between them, and laced the other ends of the sticks to the other side of the loom. That holds the cross in place for all the warp chains at once, and frees both hands for the next step: sleying the reed.
 |
| Oh yarn, you sley me. |
The sett for double-weave cloth seems extra dense, because you put twice as many ends through each dent (or slot) in the reed, which is the big rectangular frame full of slots that keeps the warp aligned and slightly separated, and which you eventually use to beat the weft thread into place. The doubling, in this case, meant two threads per dent, one for the upper layer of cloth and one for the lower.
I had learned previously to hold the cross in one hand, and pick threads from it with the other. For warp this thick, that would have been challenging—my fingers aren't terribly long—but I think I prefer it to picking from lease sticks, which was hard to do accurately with the lower threads falling between the sticks while the upper threads fell over the further stick. It may be a matter of practice, though.
 |
| I have sleyn the dragon! (No, the puns will not be stopping anytime soon.) |
Related to the caption: apparently 'sley' as in 'to thread the reed and heddles of a loom' comes from the same Germanic root as 'slay' 'to kill'. So my puns are historic!
The warp chains are unlinked enough to wrap around the breast beam—that's the frontmost piece on the loom—two or three times, snugly, which holds them steady for threading the heddles. And it looks nice.
 |
| Ever feel like you're being watched? |
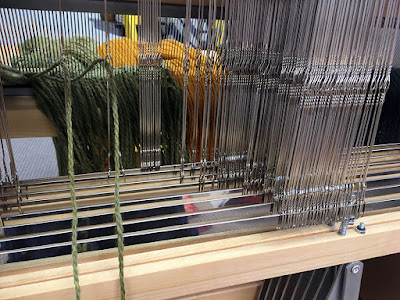
The last step of the day for me was threading the heddles. This is the part where you define which threads will move up or down at certain points in the weaving—if something's wrong, it'll be wrong the entire length of the cloth, so it's worth checking and rechecking before moving on.
For this project, shafts 1 and 3 were slated for the top layer of cloth, and 2 and 4 for the bottom layer; of the two threads in each dent, one went to shaft 1, the other to shaft 2, and the next dent's threads went to shafts 3 and 4. A very simple pattern, but still remarkably easy to botch. I checked my threading every 12 threads, and caught a few errors while I was at it.
I was also working on an eight-harness loom, so needed to space out the unused heddles on the spare shafts in between the working heddles. If I hadn't, the warp threads would have been stressed by rubbing on the loose heddles, which make a big enough block to seriously distort the threads as they pass through the loom.
And once everything was threaded, I stopped for the day, and stretched my poor aching back. Whenever I do get myself a loom, I'll also be figuring out seating that puts me at exactly the right height to thread heddles without crouching or stretching to reach them.


Comments
Post a Comment