Or at least, no longer a total mess. It's progress.
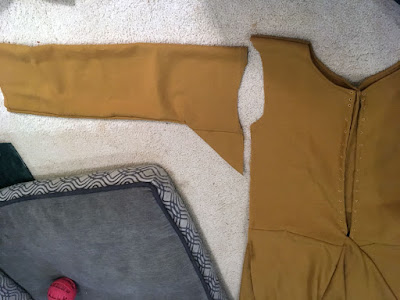 |
| Pardon the weird angle and the dog bed. |
To reduce the seriously baggy shoulders to something more humanoid (this is, after all, a middle-class 12th-century-styled cote, not a 13th century batwing cote), I trimmed a shallow curve into the armscyes and sleeve heads. I left the shoulder seam untrimmed, because the beaded collar trim will fit exactly one size and type of neckline, and I don't feel like making yet another cote just to fit the trim.
 |
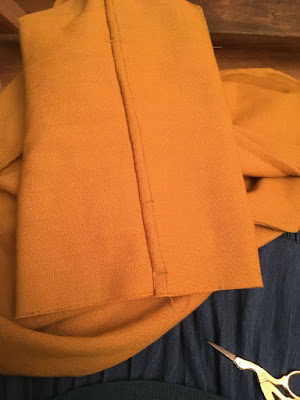
| A confluence of seams! |
French seaming the sleeve heads went smoothly, even at the three-way intersection of gusset seams and side seam.
 |
| I have no idea why those don't match. |
The side gores, on the other hand, did
not line up as neatly as they had before, and I made the executive decision not to care. Most of that seaming will be hidden under a sash, anyway.
 |
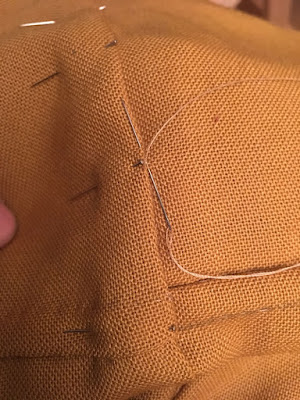
| Those pins are clinging to their straightness with the desperation of a Republican politician whose Craigslist ad seeking 'nubile boys' was just blasted across social media. |
For multi-seam intersections like this, I treat all the seams as one until I reach the point where there's enough intervening fabric to enclose each seam separately.
 |
| Okay, okay, that was a low blow. (Cue cymbals.) |
And I was lazy again and didn't trim down the selvedges—but I'd already stitched them together in the orientation for French seaming, so I still had to enclose them.
 |
| I'm just so charmed by the little green heron scissors. Less charmed by the runaway threads everywhere. |
As I stitched, I flipped the garment to check for stray threads I hadn't enclosed, and clipped them right at the fabric surface. With wear, the tiny fuzzy ends will slip to the inside of the enclosed seam.
 |
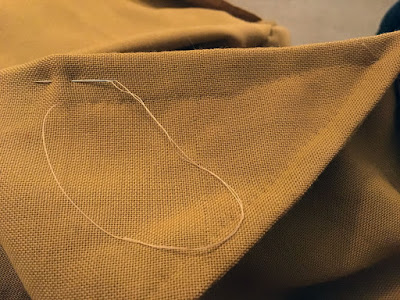
| You're looking for the two small, faint pencil marks on the seam. |
On the first set of sleeves, I'd pulled a thread parallel to the cuff edge at the first and second fold lines, to make sure the cuffs were exactly the same width all the way around and as compared to each other. I didn't do that with these ones; I just measured and marked on the seam, and winged it (wung it?
anyway).
 |
| This is the part where I get stabbed a lot. |
I pinned the first fold so that I wouldn't be wrestling with trying to hold it in place while folding up the cuff a second time. This strategy might be more satisfying for those with impervious hands. Mine are more...perforated.
 |
| Lo, the slip stitch again. This is why I didn't take photos of hemming. |
Slip stitched the cuffs in place, and spent a nice long while pinning and stitching the hem, which needed only slight trimming to smooth out the curve and shorten the skirt a little more at center front.
 |
| Those yellow beads really aren't neon in person. |
Before I reattached each piece of beaded trim, I went over it to check for loose threads and beads, and restitched or tightened up the existing stitches as necessary to keep everything firmly anchored. Ideally, I would have figured out which of the six Medieval Bead Colors to use for the background and filled it in (hint: the only color I have not already used is green. I could potentially use white or black with a little modification to floral details...), but clearly I
was lazy didn't have time for that.
 |
| I promise. They aren't. |
Loose beads fixed, I aligned the side seams of the sleeves and beaded cuffs, fit the folded edge of the cuffs over the sleeve, and pinned and smoothed and fiddled until I was happy with how they lay. The new sleeves are ever so slightly larger in circumference than the old ones, so there's slight permanent rippling at the cuff, but it's subtle even to me.
As nearly everything else with a folded edge, the cuffs are attached with a slip stitch, though a larger one than I normally use. The idea is that the collar and cuffs can be removed to wash the dress, and placed back on, so I make stitches closer to the length of a basting stitch to speed the reattachment process and make removing them before bath time easier.
 |
| Not that you'd know. |
The collar got much the same treatment, with the added complexity of needing to align all three layers of eyelets at the back neck, three on each side. The folded edge fit the neckline quite well; the open edge of the trim needed some coaxing to lay flat—again, slightly different dimensions, though not enough to cause major difficulties.
After the collar was stitched on, the only remaining task was to rethread the lacing at the back. Someday (hopefully) soon, I'll post photos of the completed garment on an actual human, rather than draped limply on a hanger.


Comments
Post a Comment