I've recently started reading
La Casa del Bosque, or
Little House in the Big Woods in Spanish, and it brought that little rhyme to mind again: "Lucy Locket lost her pocket/ Kitty Fisher found it/ Not a penny was there in it/ Only ribbon round it." As a twentieth-century child, I was immensely confused by how the girl could
lose her pocket—it's attached! to your clothes! how do you lose something that's sewn on!
Turns out, in the eighteenth century you could totally lose your pocket, because it was a separate garment with a ribbon binding to hold the two pieces together and tie it onto your waist. Someday I
do want to make pockets like that, but for now I'm contenting myself with the sewn-in kind, which I'm gradually adding to all my skirts.
 |
| Apparently I have a thing for monochrome florals. |
I actually started this last year sometime, probably when it was still warm out. My camera tells me some of these photos are from October, at least. Anyway, I thought I'd start with cute cotton print pockets for my denim skirt, which desperately needed them if it was going to keep its spot as favored wardrobe item. For the pocket pattern, I just...drew pockety shapes until they looked reasonable, and checked that my hand and my phone could fit comfortably at the same time. No useless pockets for me, thanks! (Amusing though it is to be able to fit a book in your pocket, it's really not a
practical size unless it's a very small book or a very high-waisted garment.)
 |
| I'm actually really proud of this binding. |
I don't like unfinished pocket edges on the inside of the pocket—they always seem to turn into frayed fuzz that sticks to everything else in there—and I also don't want to be fixing pockets because I was too lazy to finish the edges. So for these, I thought I'd try a hand-bound edge, using a backstitch for the actual seam, and a narrowly spaced blanket stitch to secure the raw edges.
And then there's a time skip, because I put the first pocket in about half an hour before my parents picked me up to visit the siblings in college, and I didn't have time to put the second one in, and then...I was lazy. Also I was wearing this skirt a lot, and putting the pocket in required a space of time that I
wouldn't be wearing the skirt. Challenging.
 |
| Hate hate hate cutting machine seams. Ugh. |
So at last, the second pocket! At least past-Sabine was clever enough to put in the pocket that wouldn't land on an existing seam first, so placing this one was very easy. I just had to check the distance from the waistband and mark the length of the pocket opening.
I snipped the serging first on the seam, near the center of the future pocket location, so I'd have a better chance of leaving threads intact at the top and bottom of the slit for reinforcing the seam. Once I had enough cut to wriggle my fingers through the opening, I slid my scissors along the seam, pulling out thread bits as I went.
 |
| This is the earlier pocket again... |
I inserted the pocket from the right side, with the pocket right side out, too. That way all the edges end up where I want them after flat felling, and the right side of the pocket fabric shows through the slits. I'd made these pockets with extra length at the opening, so I'd have enough fabric to fold over twice and seal in the raw edges of the pocket and the cut skirt fabric.
 |
| Quilting cotton is so easy to finger-press, I didn't bother with pins. |
As is my usual, I used a slip stitch to tack down the folded edge of pocket fabric, and thus had no fear of washing and drying by machine.
Mostly no fear. I wasn't sure how my hand-binding would hold up. Since this is the first pocket and there were an intervening three months before the second was added, I feel confident in saying that it's held up very well, and I may just continue using that as a finishing technique for pocket edges, to keep them from being too bulky under lighter skirt fabrics.
 |
| Isn't it darling? |
I had noticed that the first pocket tended to turn to the outside just a bit more than I liked, so I added a whipstitch to pull the edge of the denim over the edge of the pocket fabric a little more securely.
Pockets done, I turned to the waistband, whose elastic is pretty fatigued and not always up to holding the skirt plus whatever I've crammed in my pockets.
 |
| There is a mistake in this photo. |
I very carefully found the center front of the waistband, marked it, and snipped a slit running from not-quite-the-top-edge to not-quite-the-seam. And then I realized that typically drawstrings emerge from
two slits, with an inch or so of fabric between them. Oops. Luckily, a drawstring will still work with a single slit.
 |
| Of course the actual needle and stitches are out of focus. |
I worked buttonhole stitch around the new drawstring opening before fiddling with the elastic or with adding the ribbon, so I wouldn't have to deal with excessive fraying. That done, I fished around for the elastic for a moment before thinking,
well, what's the harm of keeping it there? No harm at all, so I stopped fussing with it and turned to my ribbon.
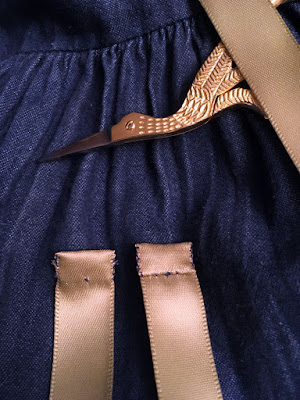 |
| Wee birdie scissors! |
I still have plenty of the wide polyester ribbon I used to reinforce the waist seam on my green silk bliaut, and it's a lovely darker-than-sage green that goes well with the pockets and the denim of the skirt. I cut a length nearly twice my waist measurement, to allow plenty of length for washing—the slit is too large to tie knots in the ends of the ribbon that won't slide through, so I'll be relying on sacrifices to the laundry gods for this one.
I didn't take any photos of how I finished the ends of the ribbon, but I think it's pretty obvious that I didn't change my thread. I just folded the ends over twice, anchored the thread in the center of the fold, and worked a very tiny slip stitch across to one edge, ladder stitched down and up again, and slip stitched across to the other edge to repeat the process. I knotted the thread and passed the needle through the enclosed end, snipping the thread right at the surface so I could wriggle the fabric to pop the tiny end back inside. Ta-da, no strings!
 |
| Look, I said it goes well, not that it's identical. Also, shiny ribbon and not-shiny pockets. |
To insert the drawstring, I finally got to make use of one of the huge blunt needles that came with a "variety pack" yonks ago. Worked better than a safety pin, actually, because it was much easier to scrunch the fabric over as I scooted it along.
The end. Now I have matching pockets, and a functional waistband...and I can continue wearing this skirt all day every day until spring.


Comments
Post a Comment