My
yellow may-have-brushed-against-a-sheep-once cote has never fit me (or, really, anyone) well, and on top of that, the seams have started giving out as the fabric frays right past the seamlines. It's time and past time to remake it, with better shaping and vastly better seam finishes.
By the way, I took approximately seven thousand photos of this process, and six thousand four hundred eighty-three of them are in this post. Sorry/you're welcome/consider yourself warned.
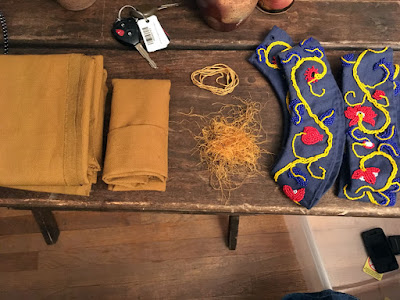 |
| I'm always fascinated by the pile of bits projects can be reduced to. |
First, of course, there is the demolition stage, which is mostly fun with interludes of perplexing, as I encounter decisions I don't remember making and no longer understand. At least I was clever enough to bind each of the eyelets that run through the beaded collar separately from the body of the cote, so removing collar and cuffs was a matter of moments.
 |
| Still love selvedges. |
The seams with selvedge-to-selvedge pieces were also delightful—just snip the thread and unzzzzzzzzzip!
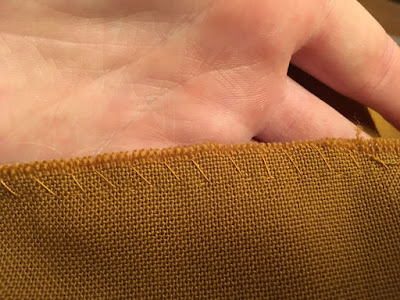 |
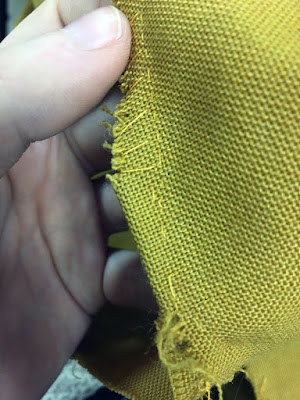
| Woefully ineffective whipstitching. |
These seams are where it starts getting tricky. I whipstitched all the cut edges in an effort to hold the fabric together, but it's wriggly synthetic stuff (look, I know, but it was $2.99 a yard and on a bargain table with other wools and I hadn't developed the touch for wool fabric yet) and threads just worked themselves free regardless of the whipping.
Luckily, I have a nice sharp seam ripper, and the wriggly synthetic doesn't hold onto sewing thread any more than it holds to itself, so working the seams open without fraying the cut edges further was less challenging than it might have been.
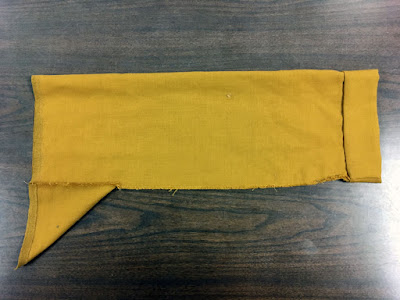 |
| Completely rectangular sleeves are stylish on pretty much nobody. |
I wanted to preserve as many pieces from the original dress as I could, but the sleeves—aside from being painfully unshaped—were suffering the most from my lackluster seam finishing.
 |
| One of the existing repairs to the sleeve seam. |
This one has a silk repair, tightly stitched just inside the original seam, now vanishing into the fringe at the cut edges of the piece.
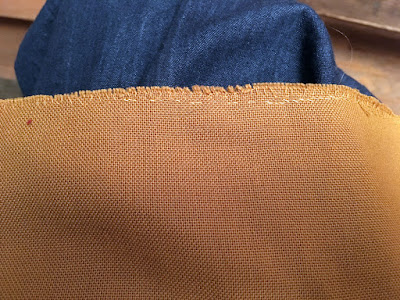
 |
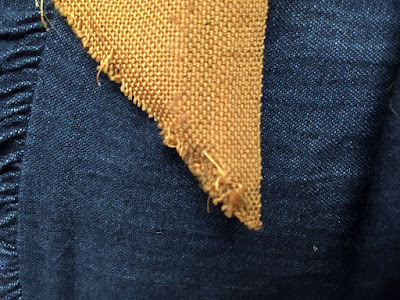
| Pay no mind to the taupe behind the curtain! Nothing there to see, nothing at all! |
And here, a speedy and very rough repair near the cuff, where the old seam had completely disintegrated, along with the base fabric.
We'll come back to the sleeves, but in short...they're a near-total loss. They take a lot of wear and motion, and the seams really do need to be finished, barring extremely well-made fabrics. This fabric, being neither well-made nor well-finished, is...um...disastrous.
 |
| This is the front(s). |
I had to carve extra width out of the front bodice after constructing it, but for some mysterious reason, didn't slash all the way down to the gore insertion.
 |
| This makes me uncomfortable. |
Presumably I was afraid of damaging the point of the gore, or stressing the fabric there, but as a solution it's not terribly graceful. I went ahead and sliced that last inch or so, separating the front into two pieces so I now have a four-piece cote with four gores in the skirt.
 |
| Much-abused tip of gore. |
Even selvedges can't keep everything together; the density of the seams and the narrow allowances I gave myself really didn't do the side gores any favors. Luckily the fabric is intact enough that with wider seam allowances and enclosed seams, I'm comfortable reusing them at almost the same size they started.
 |
| Turns out I'm not six feet tall. Who'd've guessed?! |
Also chopped out the extra four inches of length from the body pieces, a consequence of using the measurements from my first bliaut without questioning them. I lengthened the torso for it, following a speculation that the characteristic horizontal belly wrinkles are a combination of extra length and tight lacing—but a cote styled after lower-than-noble-class garb doesn't need the lengthened bodice.
With the body pieces modified, and narrowed just a little more at the side seams, I tackled the sleeves, which needed to be recut altogether. I still have about two yards of fabric (this was meant to be a bliaut before I really thought about the weight of all that fabric), so no hardship there, and I cut the sleeves with large seam allowances, to give plenty of room for French seams that, finished, landed at the same circumference as the original sleeves. Those beaded cuffs are perfectly sized for exactly one sleeve size, and I'm not taking them apart.
I also cannibalized one of the original sleeves for new sleeve gussets, again cut with larger seam allowances than the originals, whose edges were too frayed to save.
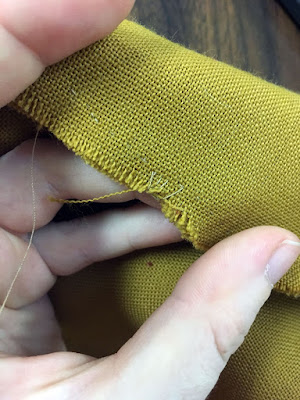 |
| Adding some whipstitches to reinforce the seam before turning and enclosing it. |
Frankly, I have no idea where this seam is. Probably center front—it's slightly curved, and the edges are frayed, so it's a pair of original pieces, and there aren't many curves on this cote. Regardless, I worked a few whipstitches into the first seam to pin down the remaining threads of the seam allowance before enclosing the seam. It may be as ineffective a measure as the whipstitches on the original were, but it made me feel better.
There's a bit yet to do, and I also need to take decent photos of the finished dress, so let's leave it here, with (almost) everything in pieces and one sleeve starting to take shape again.


Comments
Post a Comment