Kinda. Not really.
Feels like it, though, and thankfully not in the slightly alarming way the last bed frame was starting to get. Every time I make one of these I learn things, but it turns out there's an awful lot to learn about woodworking when you're starting from just about nothing.
The last frame featured my first-ever mortise and tenon work, and it wasn't bad for a first attempt. I did learn not to cheap out on the lumber when the lumber's serving as frame and fastener, though—those were rough-made joins, more or less shimmed into good behavior.
 |
| Featuring a clean cow femur. |
I wasn't exactly careful about tearing it apart. Some of that may have been how late it was when I did—my housemates were gone for a weekend, and I wanted to have demolition, construction, and clean-up all done by the time they got home, so I emptied my room (filling most of the other rooms in the house in the process) and took the old frame apart in the hours approaching midnight on Friday.
 |
| Most of those pieces are as they were in the intact frame. |
These are the tenons. No, really. I think a cracked a few pieces that hadn't already been broken, but tension and habit really were the primary forces holding the old frame together.
 |
| I call this one 'Shadow with Attendant Cat'. |
Here's a bunch of yarn and fabric (and cat, and new bed frame in need of assembly).
 |
| HahahaHA...this isn't even everything that was under my bed. |
Here's...more yarn and fabric. And about three-quarters of my kitchen, and the nightstand, and everything that was piled on the nightstand. And the old legs, head- and footboard.
A few other big items were in the office, the bathroom (as the most easily enclosed space) held fleeces and two big rolls of leather and a giant basket of blankets, and the mattress was hanging out in the other bedroom momentarily.
 |
| I had to balance the need to not drop my phone with the need to not bite through it for this, so appreciate the action shot. |
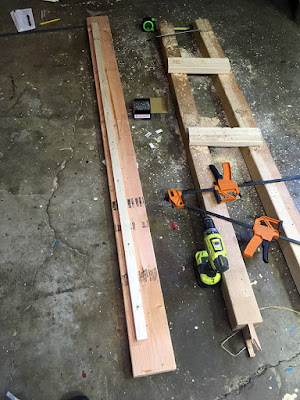
After I cut all my pieces to length, I used my
shiny new file (every project entails a new tool or two; by the time I know what I'm doing, I ought to be able to set up a decent shop) to knock the splinters and sharp corners off. I've sliced my hand open on the long edge of a piece of dimensional lumber before, so now I'm more cautious about them.
 |
| This is a high-tech work environment, if you can't tell. |
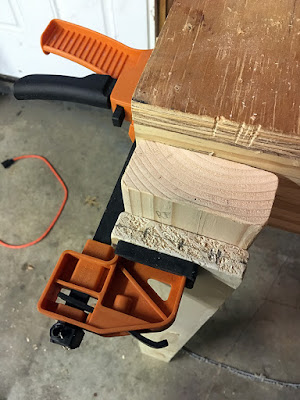
I made a sort of work station with the old frame's side rails and some offcuts, and clamped the three boards I needed to make a stepped leg together for drilling. The shortest board will support the side rails, and the longer board the head and end rails. I could have done it with two 2x4s, but that would have been simple, and I don't do simple.
 |
| This was very satisfying to create. |
I chopped a few oak dowels into bits to make pegs to help anchor my three-piece legs together, and to pin the side rails on in the end. These also got filed, bit by bit, between clamping, drilling, and gluing up legs.
 |
| Note the use of old envelopes to write down measurements. That's how you know you're becoming a carpenter, even if you're not using the right pencil. |
Slight timeskip, because it was a long day and frankly these photos all look pretty much the same in thumbnail form, and also I'm too lazy to reorder them. I used furring strips (I know, but honestly they're perfect for the job and I don't have access to a tablesaw to rip better lumber into the strips I need) to make the rests for the bed slats, centered on the length of the 2x6 side rails and about two inches below the upper edge, to make enough room for the slats and plywood platform to sit inside the frame. This part actually happened while the glued-up legs were resting.
 |
| Success! |
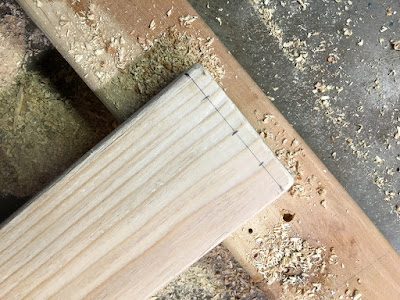
First, I drilled pairs of diagonal holes at the base and near, but not quite at, the top of each leg.
 |
| Always dry-fit before you glue. The other way lies sadness. |
Checked to make sure everything really did match up right, and that the holes did indeed run all the way through the legs, and then slathered glue on the facing surfaces of the leg boards, and on the pegs themselves, and fit everything together.
 |
| Out of frame: The Force Awakens, in glorious technicolor. |
Dry legs and prepped side rail, getting squared up for the drilling of the final peg holes at each corner. The corner on the collection of 2x4s was a bit precarious, but it served the purpose just fine.
 |
| Yes, I really am going to drill down into that 1x4. |
Wait, I thought you pegged the legs to the side rails, so why is this leg clearly independent?
I drilled the holes! But the side rails (and their pegs) are the final pieces to go on of the frame; the head and foot rails will be permanently fixed to the legs to make two π (ish) ends. And I decided to peg the end rails vertically into the end of the leg board they rest on.
I have now realized this wasn't the absolute best plan, and I need to add some diagonal braces to help keep the fasteners from tearing out of the ends of the boards, but hey. Learning things.
Meanwhile I marked three positions for pegs, very carefully centered in that 1x4.
 |
| I honestly don't remember how I got this shot, but I do remember it was a pain. |
And cut a great many little bitty quarter-inch dowel pieces for more pegs. These ones got filed while I watched Rogue One.
 |
| Probably should've taken a break to think about my strategy here. |
I also very very carefully marked the positions of the holes I needed on the end rails. What I probably should have done (aside from sucking it up and screwing these on from the inside of the leg into the end of the rail), was to find a way to prop the far end of the rail, so I could drill through rail and end board at once.
 |
| I almost didn't want to brush the board clean after this. |
Instead, I drilled them separately and hoped my measurements were perfect.
 |
| Swearing goes here. |
They weren't, quite, and neither was my vertical drilling technique. I did chisel out a slight bit of the center 2x4 in the leg shown, to get that end rail pegged nicely and snugged up to the leg.
 |
| Okay, that's satisfying. |
A mallet was involved, and one of those pegs is executing a fascinating twist inside the wood, because the holes didn't line up well. Looks nice, but unfortunately after wrestling to peg both ends of this rail, when I picked up the assembly, it groaned and wobbled so badly that I knew I needed better fasteners.
Someday I'm going to learn proper joinery, but not this day.
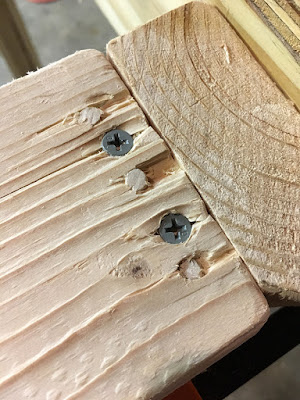 |
| But that's secure. |
I screwed the end rails in place, and that solved the wobbliness.
 |
| I may have wept a little on getting the saw out again. |
But that's not all! I have no photos of the process, but the new frame is a touch wider than the old, and the old slats didn't quite span the rails. By about four inches.
Luckily, I had screws and six feet of offcuts, so I cut each slat in half, made the offcuts into a set of one-foot extensions, and attached an extension in the middle of each pair of slat pieces to make cubist u-shaped slats. They aren't particularly beautiful (nor did I file them, because 1. it was about 16 hours into an 18-hour day at that point, and 2. the ends aren't likely to contact either me or my mattress, and that was all I cared about) but they span the bed again!
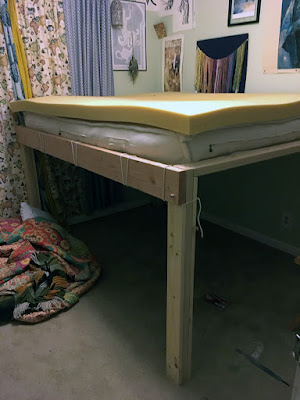 |
| Damn, gotta move the wall art again. |
In fact some of them span it slightly too well, and I ended up using clothesline to cinch in the side rails with some very long lark's head knots. I like the effect, though I continue to dream of a woodworking project that goes as planned start to finish. That near peg doesn't drive in any farther, either. I checked. The hole in the leg is too shallow by about half an inch.
Anyway, I won! It's tall enough to fit two layers of totes under, with a little space for maneuvering them, which means I have actual open floor space in my room again (or will, once I figure out what to do with the bits that were displaced from the bookshelf which now lives under the foot of the bed). I also, potentially, have the room for a nook under the bed. Just needs a floor pillow and a few throw pillows to lean against the totes, and it'll be very cozy.
And yes, it sways very gently. That's what happens when you put a bed on four-foot stilts.


Comments
Post a Comment