So I leave for Ireland in two days (
aaaAAHH), and two days ago, I finally finished sewing my luggage! The
Batshit Wishlist was well-named.
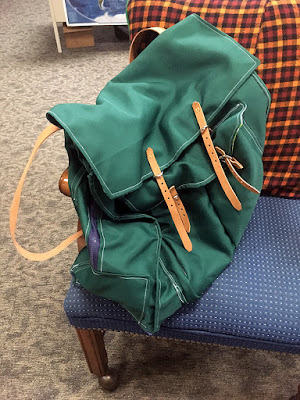 |
| Doesn't it look nice with the pillow another editor made? |
It is a very simple knapsack, and yet it gave me fits to construct—I've never made a bag before! Nor worked with canvas! Nor sewn anything much more complex than a straight line on a machine! Nor...well, you get the picture. I have no idea what I'm doing.
And yet, it looks pretty good, and I think it'll serve my purposes well.
 |
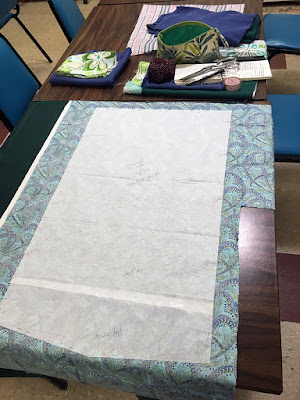
| Tea makes an excellent pattern weight. |
I drew up a few ideas before I laid out the pattern, playing with proportions and strap arrangements, and landed on a fairly typical tall-rectangle for the main body, with a large zippered chamber covered by a flap, and one large outer pocket divided in two sections, also closed with a flap. I drew up the pieces I'd need on tissue paper (which I save somewhat excessive amounts of...but it's so handy), and cut from the lining and outer fabrics at once, to make sure each piece would perfectly match its lining.
I think initially I was envisioning constructing this knapsack a bit like an 18th-century gown, with self-finished pieces whipped together, but then the strain is all carried by the thread in the seams. Not ideal for a travel bag.
 |
| This project helped a lot with working through scraps. |
Look, more stashbusting! This is the very back piece, which also has the big top flap integrated. The lining fabric is a scrap of quilting cotton; in the background, there are pieces cut from the leftovers of my garden apron, and pieces from a linen skirt I pulled apart ages ago thinking I'd be able to use it for trim on something.
The main fabric is a waterproofed polyester canvas, which I bought thinking it was cotton canvas (why? I don't know, the listing definitely said 'polyester'). I bought two yards of it, I think, because it's 60 inches wide...and received something like five yards, with a cheerful note saying 'Congratulations, this was the end of the bolt, so we gave it to you!' :)
Fabric company, I'm onto you. You just didn't want to deal with this fabric anymore. I never get bolt ends of nice cotton lawn, or corduroy, or silk. Nope. Just enough hunter green polyester canvas to make
a duck-hunting blind.
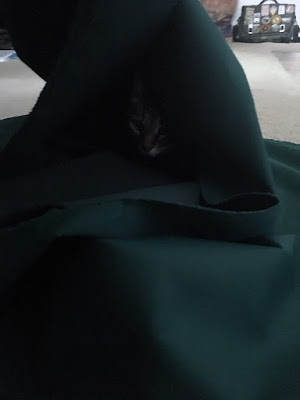 |
| Best. Cave. Ever. |
The cats at home thought the yardage spilling off the table was just the
best thing to play in.
 |
| I am the queen of piecing. |
And because my lining pieces were all made from scraps (this is a $30 custom knapsack, after all), I spent quite a bit of time piecing them to make enough length or width to cover the sections of the knapsack.
Zipper panels that run around three-quarters of the perimeter of a backpack are
long. In case you were wondering.
 |
| Machine sewing is still a mystery, but it's a fast mystery. |
I stitched all my pairs of lining/outer fabric, ready to turn and have finished edges right from the get-go. This is an excellent plan, as long as you know what the right and wrong sides of your dark green outer fabric look like. And you arrange the pieces correctly. Not that I would know, or have spent a few hours ripping out the seams I so lovingly put in. Not at all.
 |
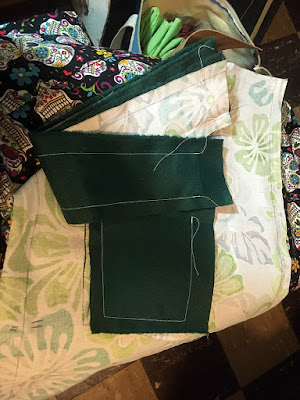
| I was smart and didn't try to turn this tube from the end. |
This one's the expansion panel for the outer pocket, which I wanted to be large enough to easily hold a water bottle and some granola bars, or whatever other items I want easy access to (a small sketchbook comes to mind, or my sewing kit). I left a gap in the stitching along the side, so I could turn two shorter half-tubes rather than trying to pull the whole thing right-side-out end-to-end.
 |
| All of my projects are, at one point or another, made of stabbing. |
And then I pinned the daylights out of all my nicely-turned piece so I could edgestitch them and make them a little less prone to acting like deflated water balloons. Two stiff fabrics stitched to each other and turned makes for a very not-flat item. Shocking.
 |
| I win. |
Somewhere in the middle, I converted a standard dual zipper (one that opens from either end toward the middle) to one that opens from the middle toward the ends. This took some doing, a new X-Acto knife blade,
an online tutorial, low swearing, and a blood sacrifice.
No, really. I bled for that zipper. I nailed my finger with the X-Acto knife while I was removing one of the plastic stoppers so I could get the zipper pull off the tracks and reverse it.
 |
| Just checking that everything aligns correctly. |
There was about two weeks of time-out sometime between the zipper and this stage, during which I worried that I was being silly and that I'd never make a functional knapsack and that really, no one sews their own luggage, and what if I did make a complete bag but it fell apart on me while I was away?? I am a simple creature with an incredible imagination, and it likes to imagine disaster.
Anyway, I got over it.
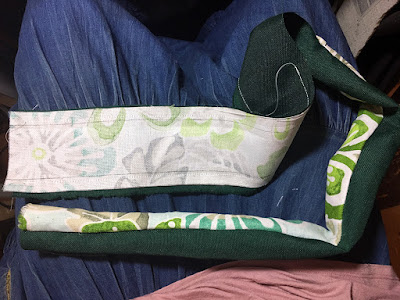
This is the flat layout of all the major pieces; it's missing the zipper gusset for the main body, and the expansion panel for the outer pocket. The outer pocket is also folded in half so I can find the midline and pin it in place on the outer layer of the main body, because it's stitched at the center, then both sides are pulled up against each other (like book pages) and stitched again, about 1.5 inches from the anchoring center seam, to make two chambers in the outer pocket.
The expansion panel got added next, first to the outer pocket piece, and then to the main body, and the flap for the outer pocket next.
 |
| I took a lot of photos of zips during this project. |
I also constructed the zipper gusset using
another tutorial. (
I love the internet and crafty people in general. Both are so good for sharing information.)
Had I realized how much of a pain the zipper pulls were going to be to put on their tracks (Every. Single. Time.) I might have tried to leave them zipped for construction. But I didn't know, and so I didn't leave them, either.
 |
| Piecing EVERYWHERE. I may be stashbusting, but that doesn't mean I'm being wasteful. |
I attached the narrower half of the zipper gusset to the internal back of the knapsack, lining first, and then outer, to enclose the raw edges and keep from having to match lines of stitching. I'm not experienced enough—or, on this project, working meticulously enough—to make nice double lines of stitching yet.
 |
| I loved those exploded diagrams you'd get with K'nex and Tinkertoys. |
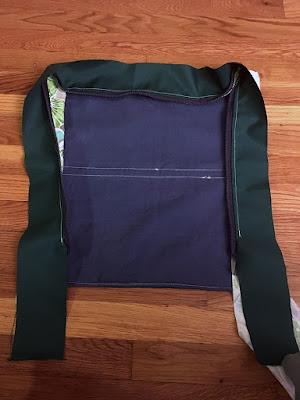
Getting closer to a finished knapsack! This was late last week, getting ready to pin the outer panel to the wider half of the zipper gusset, which I'd zipped on with a great many bad words to make sure everything would be aligned correctly.
I believe I'd also attached the flap back (of which you can only see the flap, lined in the turquoise and navy Art Deco-ish pattern) to the inner back (lined in blue, mostly obscured by the zipper gusset). They're stitched around the sides and base, which makes for a big, flat pocket accessibly by just flipping the flap open. Perfect for a large sketchbook and a little roll of pencils, say.
The original plan had been for a leather base, but I realized I wouldn't have time to stitch it, nor had I been precise enough with my design to suit the leather pieces I'd cut. So I scrapped that idea and went with a simple fabric base.
 |
| This is the good side for sure. |
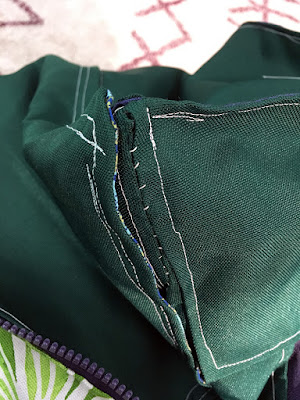
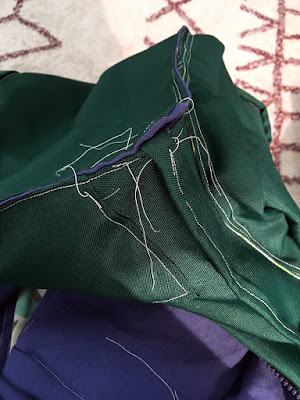
Still no base! The ends of the zipper needed to be enclosed, both to finish the raw ends of the gusset, and to keep the zipper pulls from falling right off the tracks. The zipper gusset, front, and back panels also didn't quite align at the bottoms, so I used the additional panel of canvas to even them out.
I don't...really recommend this order of operations. It was fiddly, and I bent a lot of pins (there are probably about eight layers of canvas and lining at points now) and stabbed myself a lot. Surely there's a better way to do it.
As previously mentioned, I don't know what I'm doing, but this strategy worked out fine.
 |
| Shhhhhhhhhhh, the sewing machine was doing its best. |
Attaching the base was an Experience. Many many
many layers are involved on all sides, the bag is rather unwieldy and definitely heavy compared to most of the things I've sewn on the machine. And, predictably, I had a little nasty voice in my head telling me that I was making junk, and making it badly, and that I should have just bought a bag like a normal person.
The nasty little voice and I are having chats. It's a persistent sort of creature, but luckily so am I.
The base got mostly attached, and at the very last I asked the machine to go just one more stitch closer to the corner, and it made a terrible noise and the needle came up with a nice 30-degree bend in the point, and I said (blisteringly, or maybe tearfully)
well isn't that just grand, snipped the threads, and shoved the whole mess in my project bag. I only got to sulk for about eight hours, though. Takeoff approacheth, and all that.
So I handstitched the last few inches of each corner, where the machine just couldn't quite handle the thickness of the fabric.
 |
| Strings everywhere. |
I also hand-anchored each of the many little ends the machine left, which improved the overall appearance pretty dramatically.
 |
| Look at those fancy shaped ends! |
Buckles! I bought cheap little buckles from Michaels, and used some vegetable-tanned leather from my stash
yes of course I have a leather stash, who do you think I am? for the straps and anchors for the buckles. I punched stitching holes with an awl, and stitched each of the buckles and straps on with synthetic sinew. I could have used button thread to keep the white-stitched aesthetic going, but the sinew was handier since I was already digging through my leather supplies.
I punched holes for the buckle tongues, which are almost definitely too large, but the way I attached the buckles, they self-lock if you pull up on the straps anyway.
 |
| Spoiler alert: This did not work. |
All I had left were shoulder straps, which I did honestly try to test-fit using tape. It was wildly ineffective, so instead I made an executive decision about the placement of the top ends of the straps (which, miraculously, are just far enough apart that they don't prevent a large sketchbook being slid into the 'secret' pocket between the flap back and the inner back of the knapsack). The upper ends are stitched through both back layers, to help stabilize the whole bag and distribute the strain throughout the bag, rather than having it all dangle from the end points of the seams holding the flap back to the inner back.
The lower ends I ended up roughly anchoring by stitching around them and through the flap back, which was just enough to let me try on the empty knapsack. I slid hair ties along them to mark the length to cut away when I took the knapsack off again (thanks, Callie's mom!), and then butted the ends against each other and anchored them at the joint, and about two inches away on either side.
 |
| (This is Callie.) |
Awwwwwww.
 |
| I'm slowly realizing that those buckles are probably upside-down...but this way they resist being opened, which is fine. |
Voila! It's actually pretty slick, despite my many, loud misgivings. And it is
precisely the size and number of pockets I need in my travel bag.
 |
| The plaid is sadly not part of the bag, though it goes very nicely. |
Slipping a sketchbook into the 'secret' pocket helps with structure, though I like the overall flexibility of the bag. And the top flap straps are long enough that if I needed to, I could stow something (a blanket. A bulky item, like a coat. An extraordinarily well-behaved puppy) on top of the zipped portion, and hold it in place with just the flaps.
There's one last thing from the Batshit Wishlist I'd really like to finish before takeoff. I think it can be done—if not, you won't know until I'm home again!


Comments
Post a Comment