Over the weekend, I spent one day moping around and being generally unfit for human contact, and the other day I spent swathed in fabric, pinning trim to the skirt panel at last. This part was kind of like driving through Iowa. Green, green, green,
green, brown!!, green green green, more green, oh look: green. Good thing I like green, although it now looks like a fake word.
To be quite honest, the moping started with being
done done done stitching linear trim Thursday night, and then realizing that I had nothing much lined up to begin working on next (the collar, but it's not laid out yet and I'm still not satisfied with my pattern variations for it) and moreover, what if the armbands looked plain next to the collar? So I started fiddling with possible ways to complicate the armbands without tearing out what I'd done or muddling the pattern into unreadability from a distance. My attempts were...unsatisfying.
 |
| Amusingly at this distance the different shades of gold blend right into each other. And by 'amusingly' I mean 'infuriatingly'. |
Clockwise from top left, 2-strand chain stitch sine wave running opposite the leaf-bearing one, currently-plain-but-about-to-have-a-horizontal-line-laced-through-the-leaves, running stitch echoing the leaf-bearing vine, with triplets of French knots in open corners, and split stitch echoing the leaf-bearing vine, with secondary curls.
The opposing sine wave was interesting in theory, and up close the woven viney bits are quite nice, but from even a slight distance reads as clumsily interlocked circles. The horizontal line looks
extremely modern (trust me). The running stitch is again charming close to, but invisible except as a roughening of the main vine from a distance. I find the French knot triplets too modern, too. The split stitch I
wanted to like, but it makes the main vine too heavy for the 2-strand split stitch curls...which are frankly clumsy to integrate into the main pattern anyway.
Then followed several hours of moping, during which I crankily read costumers' blogs and grumpily ate cookie dough and grouchily drove to Joann's (where I actually had a nice little conversation over the pattern table with a lady looking for a simple skirt pattern) and moodily felt at the brocades and velvets and snarled peevishly to myself about polyester content, before tetchily going to the grocery store for dinner food and carping in my head about people who park their carts diagonally in narrow aisles.
I still hadn't made any real decisions when I got home, so I curmudged to bed early.
Turning it off and on again works on human brains much more reliably than it does on computers, and in the morning I packed up my things and took them to the laundromat to take advantage of the nice long counters there while no one else was likely to be doing laundry. And I was actually quite happy with the armbands as they were.
 |
| Featuring: the beautiful wall and counter at the laundromat. |
Also, the whole embroidered piece was quite imposing (and yes, there was a little voice in my head saying "Abandon this project's deadline! Keep embroidering until you've covered the whole piece! Place the trim afterward!" I ignored this).
I also, after this photo, removed the basting threads still attaching the backing fabric at points, and considered which portion of the trim I wanted to attach first—the taffeta frays so easily that I want to leave it in large pieces as long as possible, and only cut out the individual trim sections as needed.
 |
| A certain amount of abject fear is appropriate when cutting into five months' work. |
And then
I cut into it. Screaming, terror, wailing and gnashing of teeth—! Actually, it was quite calm. Just follow along the blue stitched guidelines, very carefully, and turn up the intracranial radio to drown out the child singing the first line of Frère Jacques over and over and
over at the other end of the laundromat. To be fair, my scissors squeak, so maybe the child was trying to drown out my scissors.
 |
| Never mind my uneven rolling technique. |
Also in the interest of protecting the edges of the trim, and the embroidery, and the order of the strips, and...well...what remains of my sanity...I rolled up each strip in order as neatly as I could.
 |
| Quarter for scale. |
It wasn't very, but at least in this form I could pack the whole length in the plastic bag with the other materials, to minimize damage to the edges.
 |
| Before I put the last season of Downton Abbey on to keep me company. |
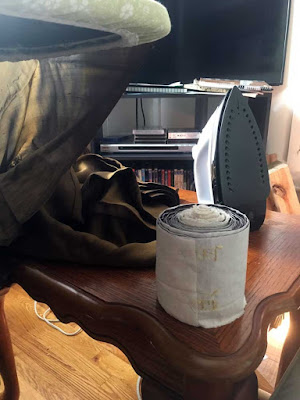
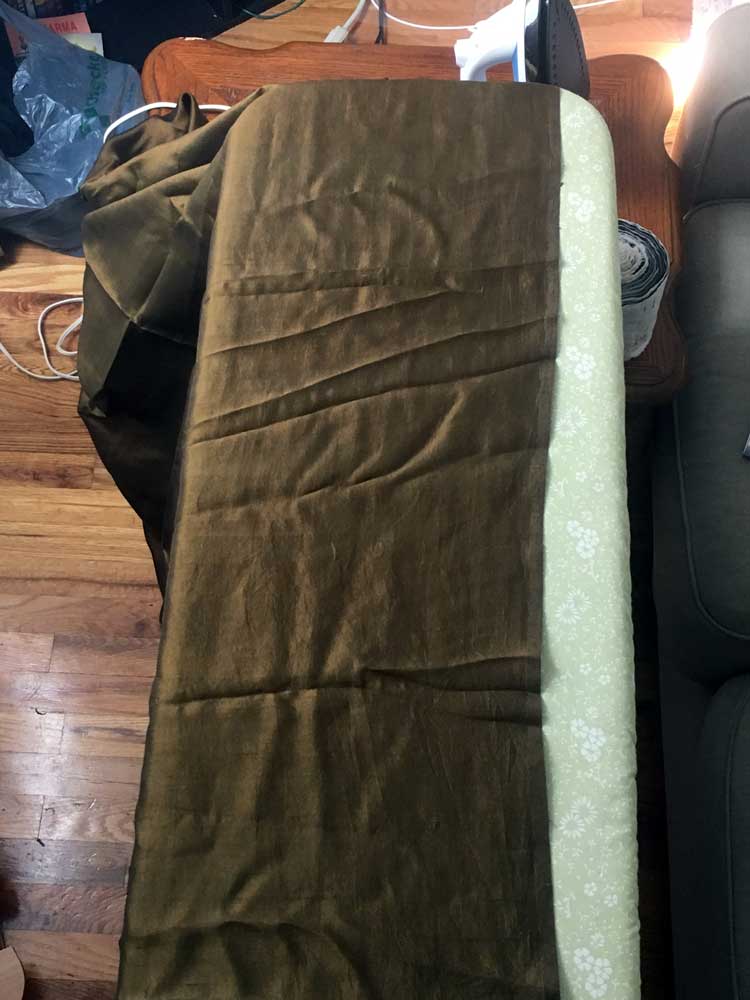
It was impossible to get a full photo of my set-up, but here's half of it—the iron, unironed fabric, and roll of trim on a table to my right, with the fabric stretched up to and across the ironing board. There's a chair at the other end to catch the fabric on after the trim's pinned. I hoped to keep the fabric from touching the floor or being an irresistible temptation for the cats to lay on. It mostly worked.
 |
| Who knew storing fine silk folded in a bag for two years would leave wrinkles? |
Speaking of plastic bags with materials in them...this fabric has been folded in the bag it arrived in off a boat from India for the better part of two years. It's a bit...wrinkled. It's also tissue-thin, so I thought the latent humidity in my apartment would serve just fine to dampen it enough for an iron to have some effect, and reduce the chances of irreversible water spotting if I used a spray bottle.
I neglected to take a photo of the lovely smooth fabric after ironing and before pinning trim over it, but trust me, it worked a treat. A (relatively) cool iron and lots of gentle passes works just fine on untreated silk. When I iron the whole thing before seaming it, I want a padded table. Seven yards of 58-inch fabric just doesn't sound great on an ironing board (and then I'll immediately crumple it all
again when I do up the side seam).
 |
| It Begins. |
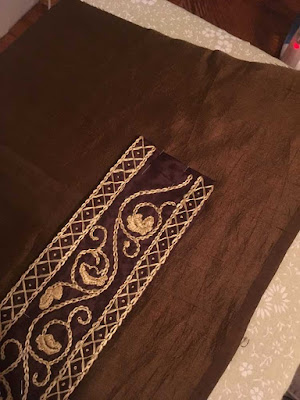
Before any pinning happened, I laid out the trim to settle its position on the skirt, and fiddled with the edges until I knew where I wanted to fold them under. My guidelines mark a 3.5-inch band, but the outer lines of chain stitch mark three inches of embroidered area, and I liked the look of having the chain stitch at the very edge of the trim. The beginning of the embroidery is also tucked just in from the edge of the skirt fabric, to leave room for the side seam.
 |
| Two weeks without fighting makes my hands look pretty good. |
All the size and placement decisions made, I started by flipping the trim over and pinning the excess at top and bottom back, pulling until I could just see the outer loops of chain stitch peeping past the edge. I also pulled the remaining blue guide threads as I went, to keep from catching them with pins.
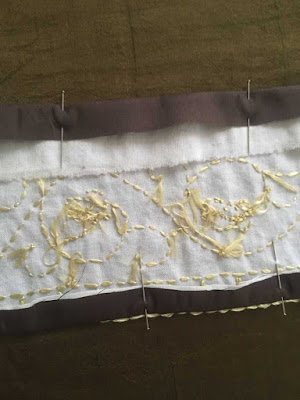 |
| I thought about placing pins closer together, but that sounded like work. |
I pinned a full strip of trim, then lightly ironed it to encourage the silk to stay put, which mostly worked. The muslin backing does stick remarkably well to the silk, so with it creased, the silk didn't fuss too much.
 |
| The bottom edge will be even, if I have to bleed over it! (I think I did, actually.) |
If I were working with any bias-cut pieces in the skirt, this part would make me very nervous. As it is, the skirt hangs straight on the cross-grain, so having heavy trim at the bottom should do no worse than pulling it straight. And for a bonus, the hem is the selvedge—and it's a nice properly-woven selvedge, too. No finish work for me!
I moved down the length of the trim, checking the distance from the hem and pinning every four inches, and ironing skirt fabric as I went. The trim isn't perfectly the same width all the way down, so the upper edge won't be as beautifully straight, but when it's worn the inconsistencies will hardly be visible.
As I approached the end of the first strip, I pinned the next segment, lining up the chain stitch lines as closely as possible, and folded back the muslin backing to reduce the bulk of the seam.
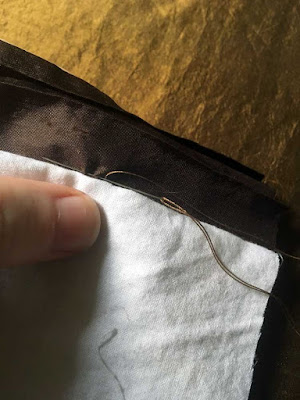 |
| Note the gold dress fabric. This photo is, if anything, shifted bluer than life. |
I stitched the pieces together with silk thread and a very tiny running stitch, right at the edge of the folded-back muslin, and pulling my stitches firmly so the join would be able to stand being stretched for the final leaf to be embroidered across it.
 |
| Awwwwwwwwwwww. |
Look at that tiny embroidery hoop! Isn't it so
cute? I can no longer remember why I bought it, but it's only four inches in diameter, which makes it perfect for finishing the scrolling vine across joins in this trim. Of course, I forgot to take photos of the process, but I just threaded my needle through the existing chain stitch lines to connect them seamlessly, added the missing French knots to the centers of the diamonds, linked up the main vine, and added a leaf and the attendant minor vines to the open loop.
The joins aren't all perfect—between the beginning of the second trim strip and the end of the third, my estimation of the width of the diamond borders had shifted dramatically, so there are a pair of
very clumsy diamonds there. They look like they might be suffering a mitotic division of some sort. Overall, though, I'm pleased with how smoothly the sections integrated into a single incredibly long panel.
 |
| The end! |
And then I got closer and closer to the end of the skirt (and the beginning of the trim—you might just be able to see the split stitch center rib in those first few leaves, which I gave up on very quickly), I began to realize that the trim was not going to make it the whole way there. It's about four inches short, actually, and given the quantities of fabric involved and the length of time I've been working on this project, I'm not even mad about it. I'll just trim the excess down before I seam the skirt, and that'll be that.
I did fold and tuck the end of the trim very carefully so the raw edges are completely hidden. There's a lot of fabric manipulation that needs to happen before I join and tack down those ends, and I don't need the embroidery base fraying to nothing while I'm at it.
 |
| I even thought about buying another box of pins earlier in the weekend. |
And this is all I had left for pins. There
might be forty pins in that pile, of my something-like-250. Also, not counting time spent laying out, cutting, and rolling trim (two hours) and setting up my workspace at home (half an hour), the
pinning alone took me 6 hours. That's almost the entirety of the final season of Downton Abbey, if you were wondering, and miraculously I did not cry on my fabric at the end. Or the middle. Or that one part, or the other one, or
that one...


Comments
Post a Comment