Time for the next big section of this dress! Which is actually getting broken into three posts, because I'm wordy and there are a ton of photos, and also because this is my blog and I'll natter if I want to. So there.
 |
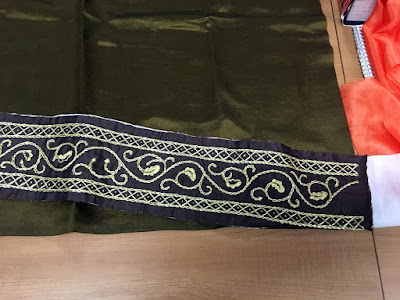
| I'm pretty pleased with the matching on these pieces. |
As with the skirt trim, first I had to graft pieces together—just two short pieces for each sleeve, and since the pieces were shorter, I didn't have as much drift in the width of the narrow borders. Very satisfying to stitch together, even if I am finally getting a little tired of this particular scrolling vine motif.
 |
| With bonus lining fabric taking over my coworker's desk. This is why I arrive early in the morning. |
As with the hem trim, I folded under the excess and pinned each piece on, stitching one edge down completely before starting on the other. Unlike the skirt, on the sleeves I wanted the trim right up against the hem, which was a little
more fiddly than placing the skirt trim three inches away from it. I was also ever so slightly over-enthusiastic about the length of embroidery for these pieces, so one seam is going to be
very slim in an effort to avoid trimming away the embroidery.
 |
| Look how green that fabric is. Deceptively. It's also still gold in the background. |
Because I was laying the first line of stitches right against the selvedge, there was a little bit of fun with checking that I was indeed actually stitching the base fabric, but once I sorted that out, attaching the trim went very quickly.
 |
| The slightly less wrinkly section in the middle is where I've ironed. |
This is about...three-quarters of the lining for one sleeve. The sleeves aren't that totally huge, but this silk is at most half the thickness of the green-gold-whatever main fabric, and for the lovely peach color to show strongly, it needs to be doubled. First, though, it needed to have the well-pressed creases from being folded up since I cut the panels ironed out, and for that I borrowed a friend's extremely clever padded table (thanks!). Squidging lighter-than-breath fabric onto my ironing board with the cats helping and the static sticking everything everywhere else sounded like no fun at all.
 |
| See how much brighter the peachiness is? |
As with the green silk, I folded the peach so the selvedges would be at the open edge of the sleeve, which will save me needing to finish those edges as I construct the sleeves. Also, it meant I could use nominally-straight edges to square up the rest of the panel as I pinned it to the outer layer.
Efficiency.
 |
| Smoooooooooth. And that's all three of the main colors playing nicely together! |
I ended up pinning the outer layer on top of the smoothed and ironed lining, after realizing I'd probably be whipstitching the three selvedges together rather than stitching a seam that would need to be turned. Also, I didn't want to arrange the two layers of lining again.
 |
| That is not a whipstitch...but it's a great shot of the scale I'm working at. |
I tried a wee section of whipstitch to bind the lining selvedges to the open edge of the cuff, but didn't much like the effect—and I worried that I might not be catching both edges of the lining. Instead, I squeezed a tiny running stitch under the free edge of the trim. It's not as invisible as I'd imagined, but if I find it really bothers me later, it's easy to modify.
 |
The Man Who Would Be King is playing in the background. This photo sounds like Sean Connery.
|
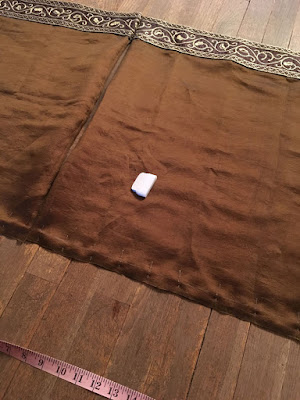
Next after attaching the lining at one edge was doing up the back seam of the sleeves to anchor it there, and to make the sleeves match in width. The panels started out about the same size, but fine fabrics are wriggly and untrustworthy under the best conditions, and being toted around in a bag for a few weeks definitely doesn't constitute "the best conditions". So I laid them out on the floor, fussed and pinned until all six layers of fabric were reasonably smooth and even, and marked a chalk line (which you can just see in the photo up there) to follow as I stitched up the initial seam. I'd considered doing separate flat-felled seams on the outer and lining layers, arranging them so the sides with the folded seam allowance faced each other, and tacking the two layers together, but after working with the lining fabric I realized that was going to be much more fiddly than I wanted to deal with. Simple, one-layer flat-felled seams won.
 |
| The pinkish tinge is in fact not a trick of the light this time. It's the lining showing through the outer fabric. |
"Simple", of course, is a misnomer, but it's simpler than the original plan. The seam is a little thicker than usual, because I didn't trim down the folded edges of the lining fabric before enclosing it; I've constructed several elements of this dress with an eye to reusing the fabric someday, if I ever get tired of it or have a better idea. Even with needle marks, a single large panel of fabric will be more usable than two narrow strips.
And that's where I left the lower sleeves, at least for a bit. The next step couldn't happen until I had upper sleeves constructed.


Comments
Post a Comment