Construction post two of three (plus errata) for the
junebug dress!
 |
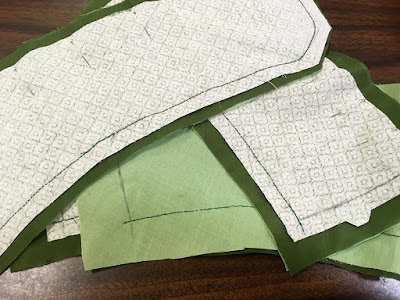
| Just ignore that partial outline up there. Turns out I don't always clock when I see "center back" that that is, in fact, where you might want two waistband pieces to overlap. |
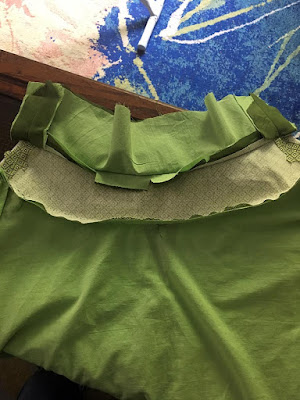
I used the waistband from a commercial pattern I've made before (successfully! It's a miracle) and modified it to have an offset button closure, after a false start where I forgot the back closures need to happen at the back, and so extending the shaped side seam edge is a bad plan.
I was tempted to make the button flap split into two or three flaps, just for the effect, but remembered that this was meant to be a
simple project. And so that idea got nixed.
 |
| This game is called 'how many pieces can I eke out of this fabric'. |
I also decided to line the waistband with only one layer of the printed cotton I'd planned to use for the bodice lining. Weight-wise, it's perfect. Fitting-on-the-fabric-I-can't-get-more-of-wise...
weeeeeeellllll. I laugh in the face of danger.
 |
| This definitely doesn't look like a skirt yet. |
Continuing my dedication to pockets in skirts, I decided to try cutting the pockets in one with the skirt lining pieces, which only just fit side by side on my fabric. I have plenty of this lawn and could have moved the pieces, but I do always enjoy the challenge of eking as much finished product as possible from the material at hand.
 |
| That's handstitching. In case that was a question you had. |
Initial seaming of the waistband pieces! I didn't want to enclose them fully, as I was hoping for a clean finish inside and out on the skirt—both for looks and for better washability—so I only stitched the top edge and the shaped button tab, and left the short seams of the waistband itself and the long bottom edge free for later.
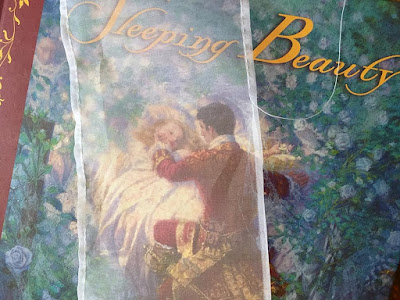 |
Sighhhhh. Now I want to make a picture book featuring organza interleaving.
|
Because the silk I'm using is so thin, I wanted to be sure the skirt would have a little body to the hem, so I very, very carefully cut two straight panels of silk organza, about five inches wide, and gave them little folded hems before attaching them to each other
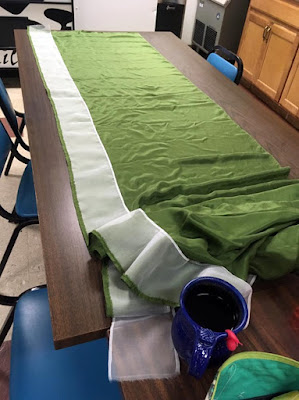 |
| You know, I considered making this dress blue to avoid exactly this situation. |
And then very delicately pinned and stitched the long strip onto the bottom edge of the skirt, using the selvedge to align the strip and the
big break room table to minimize the bumps and ripples I needed to deal with.
 |
| Dramatically thinner than regular sewing thread. |
I also tried pulling threads from the fabric to sew with for the first time, because the silk thread I bought to match...doesn't really. It's a very intense blue-toned Kelly green, and the fabric is a far yellower, lighter apple green. While I doubted the strength of pulled threads for structural seams, I love the all-but-invisible effect of using them to attach the organza (also, all that practice attaching the embroidery on my
green bliaut definitely came in handy for keeping both layers flat and aligned while regularly packing up the skirt to cram in my purse).
 |
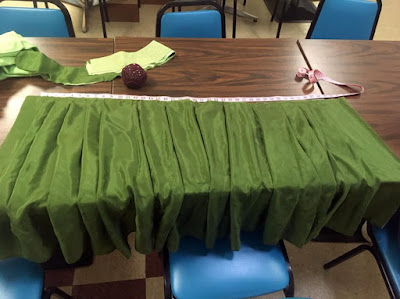
| Damn. |
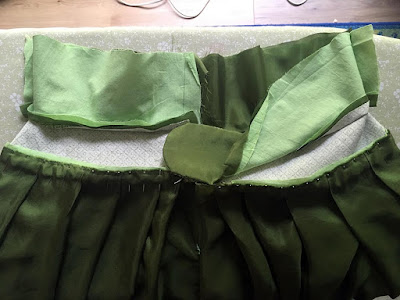
And then I got to do the pleating! Which I did not have a plan for beyond "probably knife pleats at the sides." Luckily I am a voracious reader of the blogs of costumers who love the 18th century, a period in which the pleating of vast amounts of fabric into neat, small waist circumferences is taken to the level of Art. I started with a big inverted box pleat at center front, and then put a few mirrored knife pleats (very very large ones, because there's four yards of length in the skirt panel and I needed to get it down to roughly 40 inches to fit the waistband with a slight overlap to help conceal the slit at the back waist), and then checked for the placement of the eventual pocket slits to access the pockets in the lining, and dropped some uneven box pleats in
there to maintain the overall look of the front-facing knife pleats while placing a valley fold to hold the pocket slits. (Trust me, it makes sense when you paw at the fabric.)
The box pleats, of course, necessitated reversing the direction of the knife pleats as I headed toward the center back, and also there's an offset at the back where the button tab will pull a section of the skirt across to conceal the center back slit, and
also I hadn't quite tucked away half the fabric in the front pleats, so the back knife pleats are half overlapped...
And I didn't quite get it right.
 |
| I win! |
So I unpinned and repleated and pinned the daylights out of it, and then was only a few inches long on either side—perfect for creating the final false pleat at the very back.
 |
| Right after this I broke my thread. |
I used a tiny rolled hem to finish the raw edges of the shirt panel, which definitely would have been easier before I pinned the pleating, but I managed. I also learned that organza is perfectly capable of shredding fine silk thread. I guess it's kinda like diamond being the ideal material with which to cut diamond.
 |
| There's an error in this photo, but I won't discover it for a few more hours. |
I wibbled a bit about whether to attach the lining and skirt to the waistband lining or to the outer—attached to the outer, the visible surface would show no stitching, but I might accidentally stitch in wrinkles or bubbles. Attached to the lining, I could fuss as much as I liked with the outer waistband to get it smooth, but would have a visible waist seam.
I settled on something of a compromise—both lining and outer attached to the waistband lining, but in separate stages for greater ease of fussing. Unfortunately, despite
checking, I managed to stitch the lining on inside-out, so the pockets opened from the inside. I didn't have time to unpick and fix the problem when I was working, so I just left the lining as it was and continued sewing.
 |
| I stuck myself so many times while sewing this. |
Including figuring out how exactly to pleat the final few inches of each end of the skirt panel so as to place the slit offset from the lining slit, and as thoroughly concealed as possible. This process featured...just...so many pins. So many.
 |
| Halfway, for the second time! |
My backstitch has gotten pretty fast. Thankfully. Also thankfully, all but the waistband lining fabric are extremely fine fabrics, so the wear on my hands was reduced.
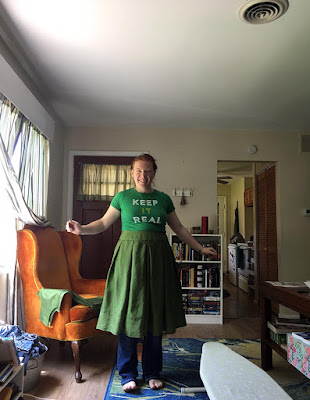 |
| I'm pretty sure it's just pinned here, but honestly I can't remember. |
And it fit! Correctly! On the first try!
That is a face of both triumph and total relief. I didn't really have a back-up plan if this one failed.
 |
| This is why no one shows you the guts of nice clothing. |
Part of the "finish pleating" process involved realizing I should've clean-finished the
other end of the waistband, even though the shaped button tab would have been trickier to finish. Because the final overlapping pleat needed to be anchored to the overlapping portion of the button tab. Which was already finished.
I made a tiny rolled hem along the top of the final pleat, and whipstitched it tightly to the button tab just in the crease between the outer and the lining. From the outside, no one will know.
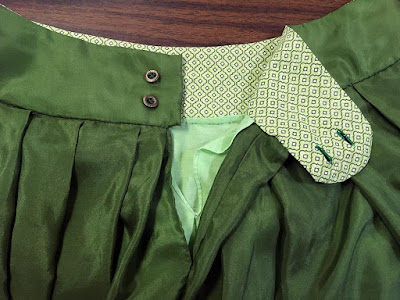 |
| That lining fabric makes me ridiculously happy. |
I also settled on two buttons, rather than the three I'd planned at first. One large button would have been visually charming, but also yet another task to complete (I'd thought about covering a plain button with scrap silk to make a perfectly matched button). Three didn't quite fit on the final shape of the button tab.
I'm pretty dang proud of the buttonholes, which are probably the neatest I've ever worked. You can see the offset slits in the lining and outer fabric here, which came out precisely as I meant them to. You might also be able to see the hemming on the lining slit, which is...inside out. And is going to stay that way; tearing the lining out to reinsert it would involve removing three layers of stitching in the waistband, plus trying to pin the daylights out of the pleated silk to keep it in place. I'll fix the lining pockets another way, and just leave the now-backwards-rolled hems as they are.


Comments
Post a Comment