So, when I first set out to make my junebug dress, I knew I wanted a swishy, full skirt, straps nearly-but-not-quite-off-the-shoulder, and that it
had to fit into the four yards of 44" silk I wanted to use.
This is all great information, but I have never met a commercial pattern that didn't require massive modification to fit me, and I know from years of perusing scans of fifties patterns that my size just isn't included in them. So first I rolled around in my fabric options; considered copping out entirely; went to the store and bought two bras that were the wrong size; came home and discovered that fact; went back to the store to return the incorrect ones and got a more-correct one; bought a crinoline; decided I couldn't possibly work on the bodice pattern without the crinoline; futzed around for a week...
And then realized I had like a month at best to make this dress, and I needed to get on it.
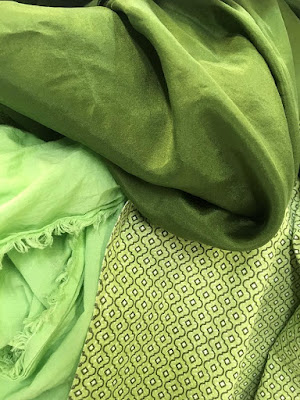 |
| So much green! |
Washed fabrics, looking gorgeous and also like a massive pile of ironing waiting for me. The silk is, of course, at the top, and is fine enough to be semi-sheer, so the whole dress needed to be lined one way or another. The patterned fabric is a quilting cotton with quite a bit of body, and the plain apple-green is cotton lawn. For structure, the bodice lining and pockets are made of the quilting cotton; the skirt just needed a bit of poof and smoothing over the stiff net of the petticoat, so that's where the lawn got used.
 |
| No, I am not good at picking a time period and sticking to it. |
I made a
lot of sketches before I landed on the finalish version of this dress, and even that went through some modification before the end. I did want to make separates that integrate into a single garment, mainly because I have lots (Three? or I guess four now...) of green dresses, and no green skirts. And it'd be nice to have another longer work skirt option. And I'm plain incapable of taking the easiest road on a project, even one with a tight deadline.
Anyway, there was a version with a sort of 1860s Zouave jacket (still...extremely tempting), and a few versions with variations of the shirtwaist/blouse variety, and some more standard formal dress type things, and an option with a laced-to-fit skirt (that's the one with the contrast panel, which may actually come back someday; I like the idea in general). Ultimately I chose the semi-backless one, partly for reasons of fabric conservation and partly for overall simplicity.
Stop laughing.
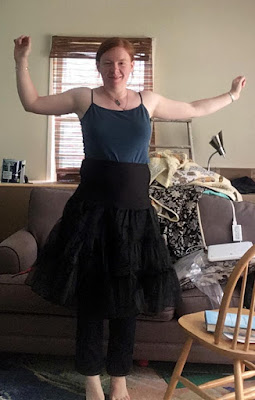 |
| Damn, I have shoulder muscles again. Sweet. |
Is it the world's best crinoline? No. But it is comfortable and fluffy, and it has an integrated slip, which is a nice detail. I hoped it'd fluff a little more with a touch more time out of the package.
 |
But wait, there were even more sketches.
|
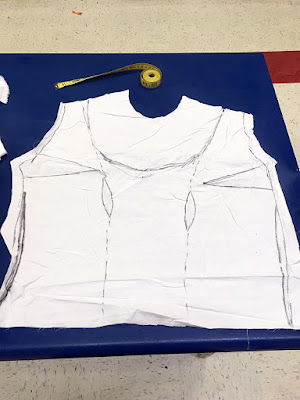
I did try to draft a pattern for an envelope bodice that would button at the sides. From my measurements alone. The less said about this attempt, the better—I am not a drafter, and not terribly likely to become one without some real instruction.
 |
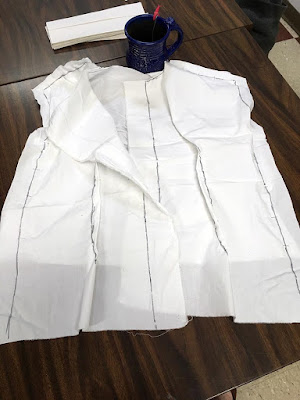
| Pro tip: do this with a lighter shirt. |
Instead, I acquired an old button-down shirt and a friend, and had her pin me into it until it fit better. This might have gone more smoothly had I been wearing the shirt correctly, but because I wanted the dress bodice to button at the back, I also wore the shirt backwards.
We didn't fuss about getting the darts perfectly even. This was for iteration the first of what was always guaranteed to be a series of muslins, and smoothing and evening out the adjustments could always be done in later stages. I used a dying sharpie to mark all the darts, then unpinned everything and cut the shirt into its component bits.
 |
| Lo, it is a holy shirt. |
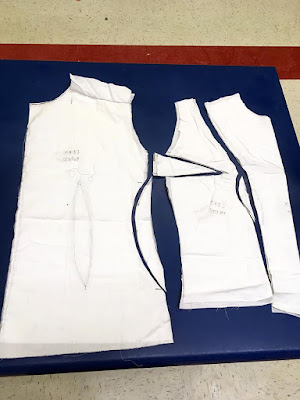
Aaaaand immediately realized I actually needed to keep the darts descending from the shoulder seam, because I didn't want them in the final dress, and the easy way to eliminate such darts is to just...make the pattern piece with that material already removed.
I cut out the remaining darts to make transferring them easier, and did the same with the back pieces. I didn't bother with the sleeves, because I was still torn about having sleeves at all on the dress, and if I had them, I was planning to simply cut them in one with the shoulder straps like very very short kimono sleeves.
 |
| That's actually the back, but it's more attractive than the front. |
I tried to machine this one together, but something bizarre happened with the machine tension after a few seams, so I finished it up by hand. Sewing machines and I just don't get along well.
I was also lazy and just pinned the darts for the sake of speed, knowing I'd want to eliminate them if possible on the next mockup.
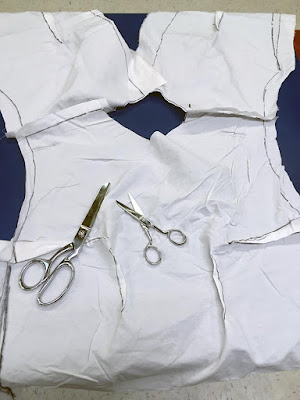 |
| This isn't a Gingher ad...but I love their scissors. |
Chop chop chop. The second fitting revealed that the shoulder seams needed to be moved pretty dramatically to sit nicely (remember, I had the original patterning shirt on backwards, so the seams were remarkably far back on my shoulders), and we pulled some more width out of the side seams.
 |
#ImAProfessional
#ThatsALie
#IHaveNoIdeaWhatImDoing |
I got up at mumblety-oh-god-why-am-I-like-this o'clock to wash fabrics at the laundromat and to cut the next iteration of a muslin. It's hard to see in the photo above, but I also sketched out where I wanted the neckline to fall, so I could implement that on the next version, too.
 |
| Yep, still 100% mismatched on the dart placement. |
This is where I decided to go ahead and do princess seams. I knew I didn't want a center front seam, and with the shaping darts falling as they did, I thought I'd stand the best chance of removing them by simply creating seams the could absorb the excess material. Besides, I knew I'd be cramming all the bodice pieces stacked one on the other down a skinny strip next to the full-length skirt panel, so narrower pieces were a serious advantage.
 |
| So much dartage. |
Version I'm-not-entirely-sure.0 is starting to look like a real pattern, with curvy seam lines and funky panel shapes. I also moved the shoulder seam by the highly scientific process of cutting my mockup in a new place, and nudged the funky mid-back darts over to the side seams, with no idea whether that would work or not.
 |
| Now with daring neckline. |
At last, working from this version, I cut the back into the semi-final shape, which (obviously) altered the fit in front—though not as badly as I'd feared—and also meant I probably could've skipped the initial back shaping, because there was very little fabric remaining to
be fitted, and what did remain wanted to be otherwise altered.
Then I spent a few days playing more with the fit, and realized I'd been overly ambitious in my tailoring goals, so shelved the cool backless blouse three days before the dance in favor of a boxier, simpler cut. I still have some green silk left, though...


Comments
Post a Comment