Time to attach sleeves and collar—and the only remaining work will be gathering and attaching the skirt.
 |
| This is where everything starts to look like a very expensive blob for a while. |
To make this simpler, I might have waited to seam the sleeves until after I'd attached them to the bodice, but really, sleeves are fiddly creatures no matter what you do, and this way involved far fewer raw edges left flapping around.
 |
| I decided it wouldn't hurt to leave the basting stitches right where they were. |
Teeny backstitch to attach the sleeves. I do prefer a whipstitch, but my edges weren't quite precise enough to hide the lining. This also saved me pulling out my basting stitches and trying to maintain the nice sleevehead curve when I folded the excess fabric in.
 |
| Flat felling! Shocking, I know. |
Extra seam security (and extra pin pricks) in the form of flat-felling the sleeve lining to the bodice lining. I worry about shoulder seams more than they probably deserve, but they are consistently the seams that get the most wear and tear from me. It's not paranoia if your seams are actually tearing out, or something.
 |
| This is some kind of whip/slip stitch hybrid... |
Not the laziest seam finish I've ever done, but certainly not the neatest, either.
 |
| Okay, so maybe grainlines matter a little bit. Some of the color shift is the lining showing through. |
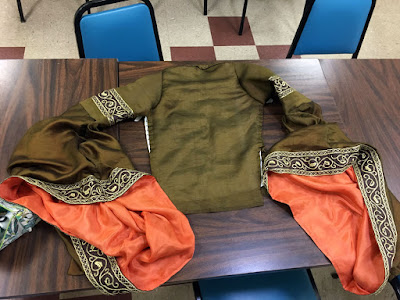
Ta-da!!
Now it looks like something real. Still can't try it on—no cutting the neckline until the collar embroidery is completely attached—but all the pieces are fitting together properly.
 |
| The cats were very polite about going around my workspace. |
Trying to flatten a bodice that's already mostly sewn together and with sleeves on while placing a collar exactly where it belongs is
not on my list of favorite activities. I did manage it, though, and the neck opening is exactly where I wanted it
and it only took a blood sacrifice and the promise of a favor to be collected at some future date.
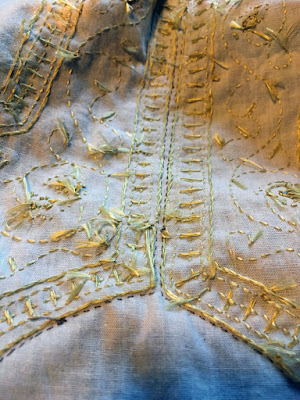 |
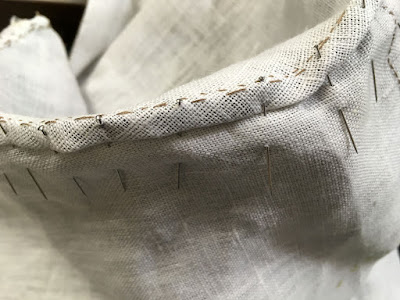
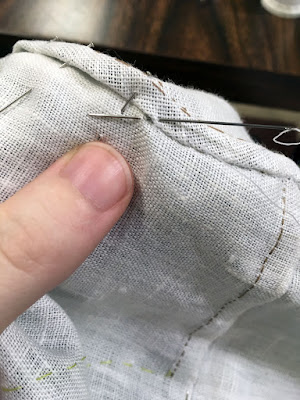
| Tiny stab stitches again. |
I stitched very carefully right at the inner edge of the embroidery, around the neck opening and at both edges of the slit. Note to self, and to anyone planning to attempt this: leave more room between the edges of the slit. More than that. A little more. Two threads on either side is
not enough fabric for the clever treat-the-collar-like-a-facing trick to work, and you
will have to top stitch everythin gto keep it intact and in place.
 |
| aaaaaaaaaaaaaAAAAAAAAAAA |
And then. I cut into the fabric. It was absolutely terrifying; I've never tried this process before, and I didn't have enough fabric to try again if I'd gotten something wrong (say, attached the embroidered piece to the dress with the wrong sides facing, something I do routinely with sleeves). Also, there was a pin trapped between the layers that I wasn't sure I'd be able to remove without some delicate fabric surgery. (Pro-tip: check for pins
before you finish creating a hermetically sealed section of dress.)
 |
| AAAAAAAAAAAAAAAAAAAAAAAA |
I mentioned that two threads on either side of the slit wasn't enough to anchor the stitching, right? This is about when I realized that. TOO LATE TO STOP NOW, JUST GOTTA KEEP CHUGGING. (No, actually, I didn't have a drink after this, but I was sorely tempted.)
I tried turning the collar once I'd cut the necessary bits, then realized I'd need to clip the seam allowance around the opening to give everything enough ease to lie flat and behave itself. So I put it all back where it came from.
 |
| Do you hear that muffled whimpering? |
I probably snipped every three-quarter-inch or so, nearly nicking the seam a few times (what a good thing I didn't have that drink, eh?), and turned everything right side out again.
 |
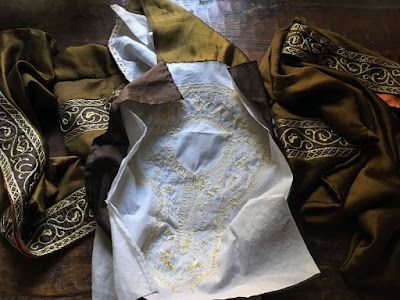
| It's...it's...aliVE!! |
Okay, so this photo is from earlier in the process (I was checking that the collar would end up facing the right way before I really hit the point of no return), but it's still very much what it looks like when you flip a wide collar from the inside to the outside of a garment.
No photos of reinforcing the edges of the slit (I was busy trying to make my
heart beat quieter so it wouldn't shake threads free), which was just a teeny whipstitch to catch a little more fabric into the seam and make it able to stand being worn.
 |
| You know that track from Interstellar titled "No Time for Caution"? Yeah, this is the exact opposite of that track. |
With the collar flipped and the slit edges stabilized, I trimmed down the excess fabric at the edges of the embroidery, tucking them under and pinning as I went. Once again, photography fell to the wayside in favor of slip stitching the edges very firmly in place, and getting the last of the pins
out of the garment before I folded it up to pack away.


Comments
Post a Comment