Last post on sleeves until I attach them to the dress! It's very exciting. (That might be the adrenaline talking.
One week left and I'm not ready.)
 |
| I think I used nearly as many pins as I needed to attach the skirt trim. |
Finishing the side seam of the lower sleeves involved a great many pins and a lot of fiddling to get everything square. I needed the embroidery to line up as closely as possible, all six layers of sleeve fabric to be caught in the seam, and for the seam to be straight. And for the base fabric and the trim to end up the same length in the end. No big deal.
Once again, both the inside and the outside of this seam needed to be presentable, so French seaming was immediately out, and after flat-felling the back seams, I didn't want to try to press six layers of squidgy fabric into submission again. A whipstitched seam, with all the layers turned to the inside of the sleeve, solved many problems—the extra layers of peach are just visible through the lining, but not visible enough to bother me. Whipstitching also creates a seam with very little bulk, perfect for the side seam of a sleeve that may need to bunch up cleanly (I do occasionally need my hands free, even when being ladylike).
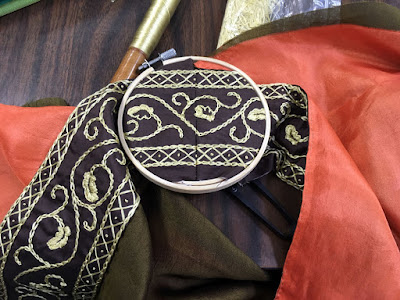 |
| I'm unspeakably proud of how neatly those panels aligned. |
Not much to say about this step—it's the same as every other grafted trim piece. I suspect this is the sleeve I forgot to leave a few inches of trim loose on, so finishing the embroidery was a bit challenging. Huzzah for selvedges and the unspeakably tiny seam allowances they make possible! Otherwise I would have really struggled to get the base fabric out of the way of the hoop.
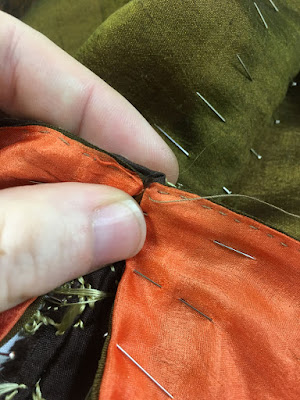 |
| Note how the pins are going in all directions. The blood sacrifice has been made and made over with this project. |
Once the trim was grafted, I needed to finish turning and pinning the edges of the base fabrics, fiddling with the exact location of the fold until I had a perfectly smooth join between the base fabric pieces, and at the perfect length to match the final trim circumference.
 |
| 'Tis only a flesh wound. |
I wrestled a bit with how I wanted to attach the lower and upper sleeves before settling on whipstitching the join—my other choices involved separating the lining and outer layers and inserting one piece into the other, and were going to be much more trouble than they were really worth. So I whipped around the whole upper edge of the lower sleeves, separating the sides to leave an opening that matched the size of the lower opening in the upper sleeve (confused yet? Maybe I should do that again with anatomical terminology: I whipped the seam from carpals to the proximal end of the radius, separating the sides to leave an opening matching the distal opening of the humeral casing...nope. Still bad).
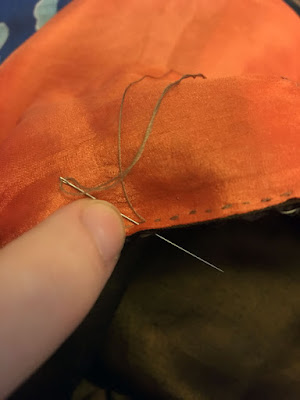
Also, if you like to stitch with the needle pointing toward your supporting hand, you will eventually be impaled. These things happen.
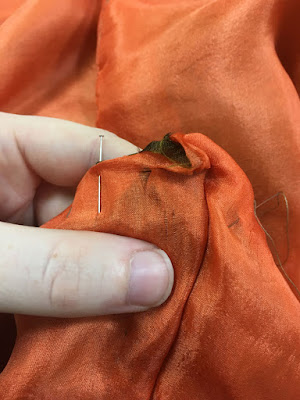 |
| The effect of removing about three stitches. |
As I came to the flat-felled seam at the back of the lower sleeves, I realized I should have left the top half inch unstitched; as it was, I couldn't continue turning the edges in, and if I didn't, I'd have a sliver of peach showing through at the back of my elbow. Luckily I am well-versed in the fine art of Undoing What Has Already Been Done, so I picked out a bit of the felled seam.
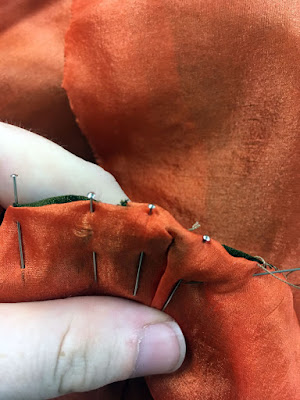 |
| Those wrinkles will press right out. |
Repinned, and kept whipstitching around. It's not perfectly smooth at that point, but far better than it started, and anyway the imperfect bits are hidden when I'm wearing the dress.
 |
| Itty bitty stitches right on top of the other itty bitty stitches. |
To tack down the trim, I used a very precisely matched stab stitch on the edges, blending the new seam into the existing seam holding the base fabrics together. At the proximal edge, I used a backstitch hidden in the chain stitch again, catching only the green layer of base fabric.
 |
| Featuring my calaveras skirt and pre-tea face. |
Not too shabby! Still only half a sleeve, though.
 |
| This little triangular join is probably the most densely stitched portion of the whole dress. |
There was a bit of fiddling with pins and folding the upper sleeves until they both matched each other and fell to the proper location on my arms, and then I inserted them right-sides-facing into the openings I'd left in the lower sleeves.
Then more fiddling, to get the seams settled correctly.
And finally, another round of whipstitching! I love whipstitch. So fast, so sturdy, and (done carefully) so nearly invisible when done. I anchored the point where the lower sleeve seam and the connecting seam intersected
very firmly; it's a point that's likely to take a lot of wear, so the extra security is worth a tiny bit of bulk.
 |
| Guess what kind of stitch that is? Surprise, it's a whipstitch. |
I'd folded quite a bit of extra fabric to the inside of the upper sleeves, so to anchor it and finish the raw edges I used the world's laziest whipstitch, tacking the folded edge to the linen lining to keep the finish invisible from the outside.
 |
| Suddenly my green sleeves are bronze. Maybe I'll write a song for this dress. |
Ta-da! The reason there are so many depictions of people in this pose is that if you don't default to it, your hands vanish forever into the yards and yards of fabric crammed into your sleeves. At least, that's my story and I'm sticking to it. (Also, in winter, it is
marvelously warm.)
 |
| I should have brought props. |
I am fairly certain I startled potential new neighbors getting these photos. It's good for them to know what they're getting into, moving in here. This photo also shows the open underarm, and the interesting effect the lining gives when light shines through the sleeves.


Comments
Post a Comment