Sometime last year, Valerie convinced me that we should a. go to the local con and b. dress up for it. I like dressing up; she's stoked to do a couple cosplay (Aziraphale and Crowley in semi-modern garb with cardboard wings, because it amused us and we don't have time for big wing builds this year); I'm also planning to wear my glorious silk bliaut because why
wouldn't I take an opportunity to wear it. And, because I didn't have enough projects planned already, I thought I'd add another cosplay to the list. I've long loved Garth Nix's Old Kingdom series (particularly the core trilogy, which I came across as an apparently-finished unit in...probably middle school...) and thought it would be glorious to make wearable-in-everyday-life versions of several of the garments described.
Along with that, I picked up a remnant of a brushed cotton twill at Kris Kinder last year that's a lovely blue-black, and just the right weight for a somewhat formal surcoat. Stash usage
and marking a long-desired project off!
RIP in peace to my sleep schedule, though.
 |
| I kind of love cutting diagrams. |
So, for some reason, I thought I'd bought 3 yards of this fabric, and made my initial plan based on 3 yards of 44" fabric, and using up nearly all of it. (That's the diagram in pen in my little notebook, which I'm going to need to get a replacement for soon.)
When I got the fabric out of my bag, I realized that the label clearly says '1y 12" ' which translates as "one yard and twelve inches" which is not
remotely like 3 yards. At least I remembered the width somewhat correctly?
Having discovered this, I made a new plan for a much more rectangular, rather shorter surcoat (the pencil diagrams).
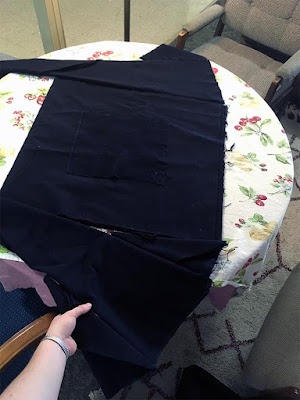
And then I opened up the fabric, and opened it, and opened it, and opened it...
The fabric
was about 42 inches wide, but I had more like 2 yards and 26 inches. So I went back to the 3-yard plan and just shortened the body panels and gores by a few inches.
 |
| Simpler and fewer seams, or more complex and more seams? |
I got as far as ripping all my panels—four 11-inch-wide by half-the-length-of-fabric pieces for the centers of the four quarters of the surcoat (why quarters instead of halves? Because I like pain, that's why. Also it makes inserting front and back gores easier), four 11-inch-wide by probably-a-yard-I-don't-remember pieces to cut diagonally for the large gores on either side of each quarter, and four 11-inch-wide by about-20-inches pieces to cut diagonally for the even smaller gores meant to go on the outermost edges of each quarter.
And then I thought, well, I should check how this will all lay before I cut any triangles. Rectangles are pretty easy to make into something else, but triangles are kind of a pain. And naturally, I wanted to see how adding two smaller gores on either side of the big gores would work, compared with one larger small gore only on the outer edge.
The two smaller gores won. Naturally.
 |
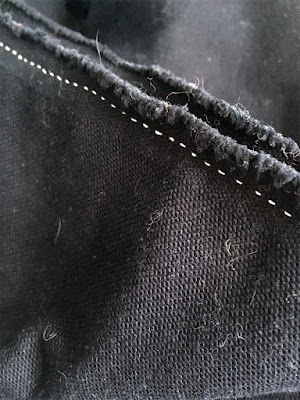
| Sneaky elastic! |
While ripping, I noticed tiny, spider silk-like threads of elastic clinging together just slightly longer than the cotton, and on testing the fabric, discovered that it has pretty serious one-way stretch. I guess that would've been one way to make it work, had it actually been a very short length, but it'll just be an amusing and irrelevant factor now.
 |
| I'm not sure where my big shears are. Somewhere in the studio, no doubt. |
Having decided I needed a MILLION gores for this "quick" cosplay project, I tore all the existing small-gore rectangles in half again, and then used tailor's chalk conveniently stashed in my sewing bag (weird, I know) to mark my diagonals before I cut them. I also narrowly avoided disaster by noting that brushed twill has extremely distinct front and back sides, and that I would need to be sure to create mirrored sets of gores so as to maintain alternating bias- and straight-cut edges at all the seams.
 |
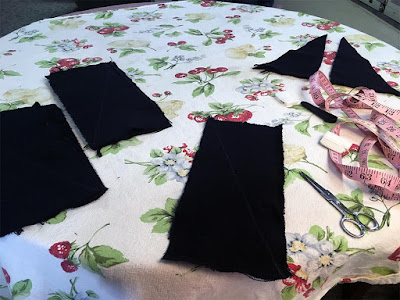
| #thicc |
Just the small gores stacked here. There are
many, and the fabric is lusciously thick.
 |
| Possibly a little overly organized. |
I laid out all my pieces and numbered them to keep myself organized. The chalk slashes were originally to mark the twill direction as well as to separate the notation for which quarter the pieces belonged to (these are the front left) from the notes for their side and order within that quarter. I realized eventually that all the twill lines run the same way, but kept the slashes anyway.
I also, on the third quarter, realized I had the outermost small gores swapped. Rather than mirroring each other across the large gore, they should angle the same direction—because the large gores mirror each other across the center rectangle, so their bias- and straight-cut edges are also mirrored. From the (straight-cut) edge of the center rectangle, heading right, I should have the bias edge of a small gore, its straight edge against the bias edge of a large gore, and its straight edge against the bias edge of the second small gore.
For bonus points, this puts the straight edges of the large and small gores against each other where the panels meet. Minimal future warping at the seams!
 |
| This baby's gonna be so dramatic. |
I'm using linen thread, which I'm waxing as I go, to stitch everything up. With a backstitch. See above in re: I like pain. The in-universe explanation is that this is a garment for a necromancer whose chief job is the laying to rest of everything the unscrupulous ones raise up, so it needs to be strongly made, and that machine-made clothing falls apart in the kingdom where this is a job and a concern. The practical explanation is that I like handsewing, and I hadn't gotten to try linen thread yet.
I'm sold. I'm in love. It's lovely to work with, and I like the slight tackiness of the beeswax, and I'm being forced to work with lengths somewhat shorter than my armspan, which is making for neater seams.
Also, to clarify: the above is one pieced gore, which needs to be attached to a center rectangular panel and matched with a mirrored friend before it will make one quarter of the surcoat.
 |
| I'll have to figure out how to iron this stuff. |
This is a single fully constructed quarter.
 |
| My seams have been absolutely gorgeous on this project. |
Something about this project has led me to make beautiful straight seams without any markings. I've also, almost spontaneously, worked out how to sew with a metal thimble, after years of trying and getting frustrated by how clumsy it made my middle finger. This is truly a magical project. And it's all backstitched, so it had better last for a while.
 |
| Someday soon there will be a proper mirror for full-length fit checks. |
I pinned the side seams, front, back, and shoulders, making my best guesses about depth of arm openings and general size of neck opening, not to mention the slope of my shoulders, and managed to wriggle into the inside-out-which-means-fuzzy-side-in-which-isn't-very-slip-on-able garment for a fit and silhouette check. The overall shape and size is good, and I nailed the arm openings, so just had to adjust the back seam and neck opening, and open up the side and front seams from the hem upward for a more surcoaty and less pinafore-dressy look.
The original plan here was to have all the construction in one post, and embellishment in another, but as this is already quite long, I'm going to go ahead and break it into Yet More Posts. Mostly because then I can be as long-winded as I like (and you may have noticed, I Like It Very Much).


Comments
Post a Comment