This project was born of procrastination, stubbornness, spite, and...financial responsibility? One of these things is not like the others.
 |
| I tried doing an "artistically rumpled" version, but it turns out that requires much more skill than I possess. |
Nonetheless, it is a beautiful blanket, and I hope it will keep me warm on long plane rides (more on that later) and not take up too much space in my bag (more on that laterer).
 |
| Pardon the drunken sleep-deprived angle. |
I had about two yards of natural linen left from a purchase about four years ago, and several (sixish?) yards of the same I'd overdyed a lovely muted teal, as well as the last remaining scrap of rich red linen from
K's 12th-century outfit. I also had a project I was avoiding because
I'm afraid of it I needed a large non-cat-assisted table to spread it out on. So I tore off a matching piece of muted teal linen, ironed both pieces, and immediately creased my freshly flattened fabrics to find dead center on both.
 |
| I love linen. |
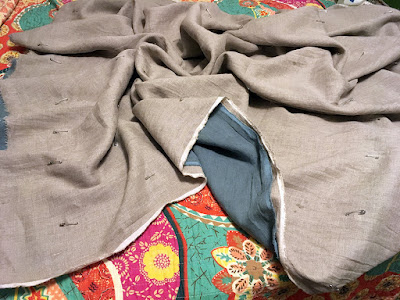
Ta-da! That's where I started pinning them, since I lacked enough space to spread them both out fully. I just worked one quadrant at a time from the center, brushing wrinkles out toward the corners.
 |
Artful Rumpling is the name of my folk band.
|
After I got everything pinned, I thought, oh, I'll just get started on the kantha-inspired quilting I'm going to do to hold the layers together.
 |
| This may be the first quilting I've ever done. |
And then I quilted the whole blanket. Oops? (Button thread, large needle, extremely large stitches—somewhere in the half-to-three-quarter-inch region.)
 |
| I'm going to regret this decision about 37 hours after making it. |
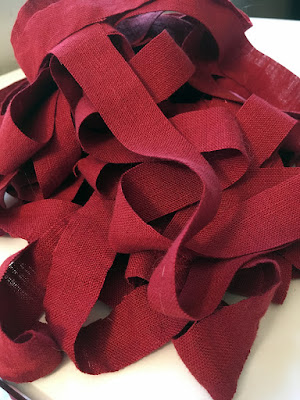
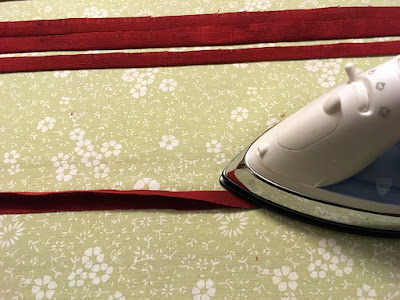
With the body of the blanket done, I tackled the most time-consuming portion: the border. I knew I wanted to use stash fabric up on it, and that I wanted to add some contrast to my extremely neutral blanket, so I decided to make some narrow, flat piping out of a small scrap of red linen. Because I am incapable of doing easy things, I wanted to make
half-inch piping. Which meant one-inch strips of fabric.
I'm not particularly skilled at following a perfectly straight line with scissors unless I have some kind of reference to follow, so I decided to pull threads from my red linen to create faint cutting lines.
Surprise! While linen sewing thread is unspeakably strong, this woven linen is not very, especially where it's slubbed, and that means in the midst of gathering up a length of cloth onto a single component thread (okay, when you put it that way, failure seems inevitable) —it will almost certainly snap. I wrestled through five threads, looked in despair at the fragments of red fluff and my already slightly aching fingertips, and decided to just wing it.
 |
| I cannot convey to you how tempting it was to throw all those strips in the air. |
And it
worked. Mostly because even I can keep about an inch border on one side of the scissors for less than a yard of fabric.
 |
| Dramatic Piping (that's the name of my Irish death metal duo. Have you ever heard screamo paired with a pennywhistle?) |
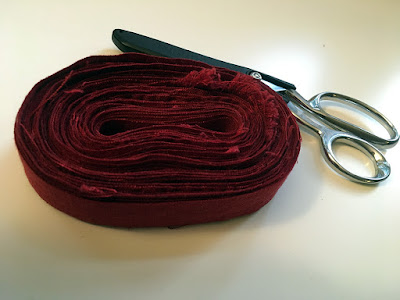
I wound up the pre-piping to keep it from getting tangled or frayed (and to make it much less interesting to the resident cats).
 |
| A noodle. |
This photo is really self explanatory, though looking at the colors, I'm reminded of the factoid that operating rooms are painted that odd mint-green because it's the inverse of blood-red and it helps keep the surgeons from getting nauseated by afterimages on the walls. That's a thing you know now.
 |
| No fingers were harmed in the making of this photo. We make no promises about the other ones. |
Fold little bitty somewhat-soggy strip in half and finger-press to start the process...
 |
| Toldja there was potential finger injury. |
...
and then press it with a very toasty iron.
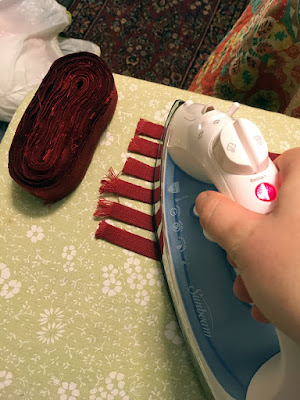 |
| How many patterns can I pack into one casual shot? |
I lined up six pressed strips at a time, gave them one more quick go-over, and then wound them into a little disk to keep them organized and (more importantly) folded until I needed them.
 |
| Don't you use your square for sewing? |
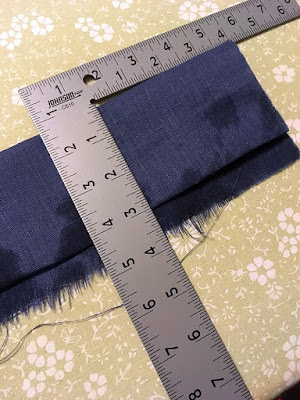
I'd also decided to make a wide blue binding, which I double folded to three inches, with only a half-inch fold at the open edge—not a huge amount to anchor it with, but not horribly small, either. The frayed edges are from tearing the strips, which is
probably my favorite way to get straight edges on larger pieces of fabric.
 |
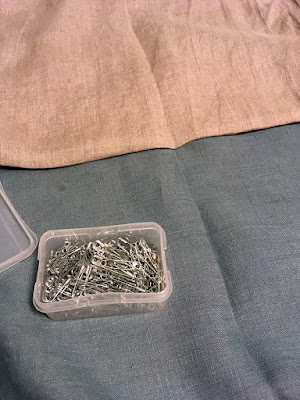
| There were not enough pins in the world for this task. |
I laid out the blanket center on the living room floor, and started tucking the blue binding around the edge, with the red piping nudged under the blue edge and pinned roughly in place. At this point, I was planning to machine-sew the border, and I knew there was an easier way to get a single visible line of stitching, but could not for the life of me work it out.
Yes, I had internet access.
No, I did not google it.
...nnnnno, I don't know why. Stubbornness? At this point that's less a character trait and more a genetically-encoded law of being for me.
 |
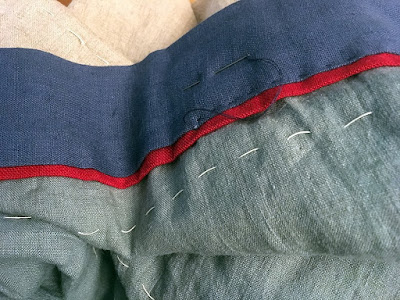
| That's not a real mitered corner, but I like it anyway. |
Same thing happened with the mitered corners, except that I did in fact look up how one miters the corner of quilt binding, and then I looked at what I'd already accomplished, and then I decided I was not attached enough to the idea of perfect mitered corners to unpin everything. So I invented my own corner turn (taken in part from origami folds I still remember) and snipped the teeny red piping, rather than try to execute a similar move with it.
 |
| Kinda digging this color combination, much though I wish it were a little less RED WHITE AND BLUE. |
And then, having pinned the binding/piping combination to both sides of the blanket at once (separate sets of pins. No, I still don't know why I did that. Possibly because my primary frame of reference for sewing is still [and always] handsewing, and layered pins are no real issue there), I chickened out of machine sewing it and potentially:
1. Having the binding or piping slip on the underside and having to unpick machine stitches.
2. Sewing right into a pin and snapping a needle, which pieces would of course then fly into my eye and blind me in vengeance.
3. Breaking the machine altogether, because I wanted to place the seam at a point that would mean ten layers of linen (two for the center sandwich, four total for the blue binding, and four total for the red piping).
Instead, I stab stitched the whole thing with doubled thread in two evenings, which entailed only a tiny bit of unpicking when the piping slipped, and minor weeping when I realized I was going the direction that meant my left hand would be impaling itself on every set of pins holding the join between sections of binding. Oops.
It is, in the end, a glorious blanket, and I'm deeply satisfied with pretty much everything about it. Even if I am going to do the binding completely differently whenever I get around to making another one.


Comments
Post a Comment