Gardening season is in full swing, which means (of course) I'm outside a lot, playing my very own version of Russian roulette. It's called How Many Times Must Sabine Get Burnt Before She Learns To Wear Sunscreen. It's not a very fun game.
 |
| Yes, I'm using this photo again. Sue me. |
But this year, I have a plan! (Yes, there's also sunscreen.) I have a big straw hat that should fit me just fine with a little reshaping, and an armful of discount flowers from the craft store.
 |
| It's important to arrange your supplies in as many pretty ways as possible before making anything. |
Look at them! Aren't they lovely? I'm going to pile them all on the hat, and confuse all the bees.I may use some of my ribbon collection, too, and I'm definitely planning to pull together a lining out of some of the scraps I can't quite bear to get rid of.
 |
| Making good use of a new tote before I fill it with...erm...craft supplies. |
The crown of this hat is just a touch too small for my head, so I soaked the whole thing overnight in a tote, weighted with a very heavy bowl I made in my one ceramics class in college.
 |
| Probably should've tried for placing the outermost seam on the brim other than front and center... |
Thoroughly sodden (both me and the hat...I've taken up running in the mornings, so the showers have moved up in the schedule, too), I crammed it on my head until the crown took a more skull-shaped aspect, and fiddled with the brim a bit, too. When I was happy with everything, I very gently set the hat on the rim of the tub to dry, and left for the weekend. I really can't help fiddling with things if I'm around, so it was best for everyone that I let it do its drying all alone.
 |
| It's a good thing my sheets aren't white. |
As part of packing up my apartment, I've been picking projects to push to a finish or stopping point, to minimize what I feel I
need out for entertainment purposes. Part of that is finishing my garden hat! The hat itself doesn't take up much room, but the flowers I want to pile on it certainly do.
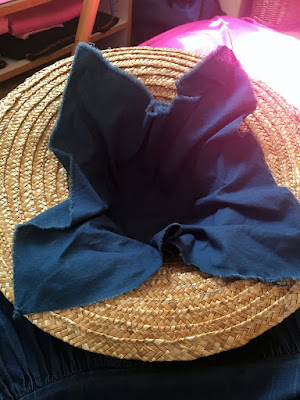
I probably should have started with the flowers, but I felt more comfortable playing with fabric for a lining—the straw is rough enough that it's been catching my hair every time I put the hat on, and even with reshaping, the crown just isn't quite big enough to jam on my head effectively, so I needed to add ties as well. I started with a rough-torn square of blue cotton leftover from
my fighting pants, and pushed it into the crown to see what I was working with.
 |
| I have no idea what I'm doing. |
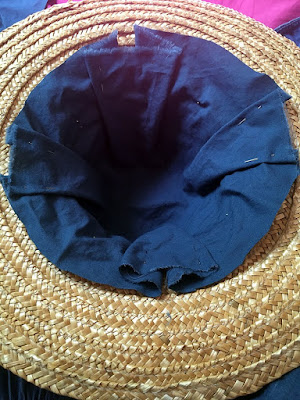
With some tapered box pleating, I came up with a decent lining for the crown, held in place with pins just stabbed straight through the fabric and the sides of the hat...there was also some incidental stabbing of me in the process. I trimmed the overhanging corners of fabric away, and turned to the brim.
 |
| Still no idea what I'm doing, but it looks nice! |
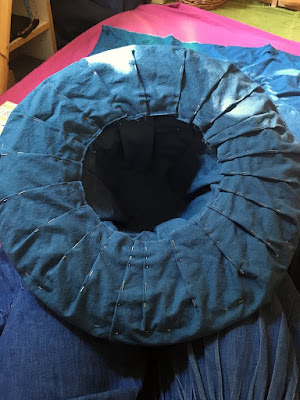
I tore two strips of fabric about an inch wider than the brim, to give me some wiggle room for turning under the raw edges, and pieced them into one very long strip before I started attaching them to the hat. I just picked a spot to anchor the seam (why the seam? I've no idea. It seemed smart at the time) and started pleating from there, mostly aiming for small enough pleats to have them release completely by the outer edge of the brim. I pinned the pleat edges down, and added pins at the outer edge of the brim to keep the fabric fairly taut. No fussing with the intersection between the brim and crown lining yet—I still needed to make and attach the ties before I really settled on a strategy there.
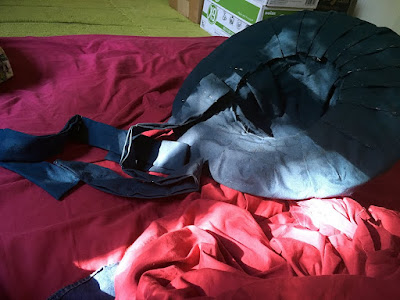 |
| Straps, for maximum adorableness and to keep the silly thing on my head. |
I wanted wide ties, so ended up tearing two long strips of fabric and folding them in half, then tucking the raw edges inside so I could whipstitch the long seam—whipstitch may be slow, but I far prefer it to wrestling a long skinny fabric tube to turn it. The ties ended up about 32 inches long, and maybe an inch and a half wide.
 |
| No need for neatness...I begin to see the appeal of millinery. |
Without any clear plan, I tacked the ties onto opposite sides of the crown, tucking them well under the intersection between crown and brim lining. I didn't bother making my stitches neat—I have plans for so many flowers and (maybe) ribbons on the outside that even if the stitched areas are still visible, a few white threads won't stand out.
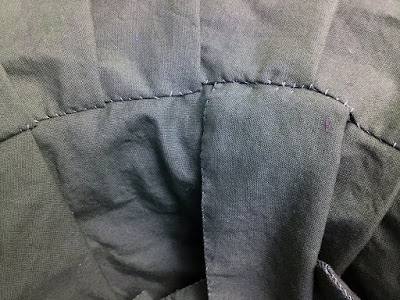 |
| These stitches are totally visible, but: I don't care. |
I turned under the raw edge of the brim lining and whipstitched it to the crown lining. When I came to the ties, I stitched across one side, then stitched back along the other side, anchoring them to the crown and brim lining, and then continued around the lining. I left the outer edge of the brim lining unstitched, so I'd be able to let the whole thing hang from the ties while I stitched flowers on the crown.
Next time, I'll do flowers first, and then fuss with linings.
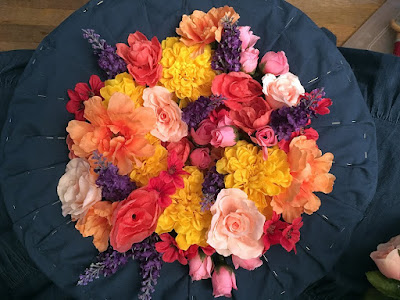 |
| At last, a photo with reasonably true colors. |
I beheaded my pile of fake flowers and piled them into the hat (mostly for picture-taking purposes. A little bit for color distribution purposes).
 |
| The First...Flower...Of Christmas! (If you're not familiar with The Polar Express, that reference is not going to land. You should check it out if you haven't read it! It's charming.) |
And started stitching! I'm using regular white sewing thread, doubled for strength, and a sturdy needle with a small eye, and stitching through the plastic shank at the base of each flower a few times to attach and angle them.
Some of the flowers have extra plastic pieces meant to support the fabric petals, which I started pulling off when I realized I could get the flowers pressed closer to each other and to the sides of the hat without them. Also, it's two fewer layers of plastic to force my needle through. I'm finally making good use of my much-neglected thimble, in an effort to keep from impaling myself on the head of the needle.
 |
| This is not the reason I decided to line this hat, but it is a good reason to line the hat. |
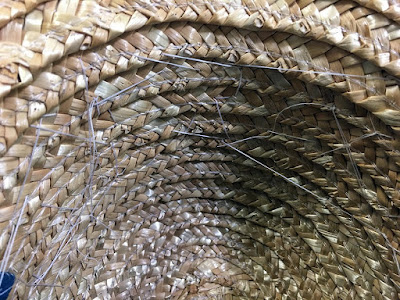
Once I'd finished stuffing all but three of my flowers onto the hat, and most of their leaves (three yellow chrysanthemums didn't make the cut—they're very large, and threatened to overwhelm the other flowers), the inside looked...well. It looked like a rather industrious but extremely tripped out spider had had a field day.
 |
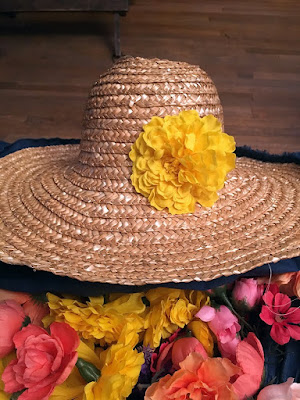
| Super cute and super fast. |
Hooray for lining. No sign of the mess engendered by attaching a few dozen fake flowers, and no more snagging my hair on straw, either. I went with contrast stitching because
that's what I had in my pocketses it's already a big silly hat, and I might as well lean into that.
I did end up with one small knot in the contrast thread, which I didn't notice until I'd finished it. I snipped the thread at the knot and pulled out a few inches on either side to anchor the cut ends, and used some of the leftover embroidery floss to fill in the gap. It's nearly invisible even to me, and I know where the splice is.
Finished photos in a day or two! A hat this marvelous deserves to be staged in a garden.


Comments
Post a Comment