Another very long post in which I probably feature too many very-similar photos, but this is for my reference as much as yours, so there.
 |
| You may be able to see the rubbed-out directional letters. Left and right remain challenging concepts. |
First of all, I realized the sidedness of the fabric in combination with the sidedness of the pattern would mean each piece went on the
opposite foot from what I'd marked. Glad I noticed before any stitching or pinning occurred.
 |
| Gotta stay hydrated when sewing. |
Pinning the back and sole seams wasn't too challenging, although I did relearn the crucial importance of marking at least one matching point on pieces where it might not be immediately obvious. Like, say, a sole piece and its corresponding upper (which is itself composed of two weird pieces and three seams). Just for an example. Totally random. I definitely didn't have to pin the sole twice to get it fitted right.
 |
| A fitting showed some extra room to be removed from the ankle. |
I'd added room to the ankle when cutting the leg pieces, for fear of making them too narrow to squeeze my feet through. As it turns out, muslins in the actual garment fabric (or something like it) are really worth doing; I took nearly all the added ankle width right back out, first by pinning...
 |
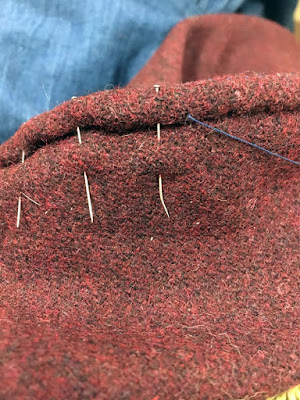
| I probably used twice as much thread to baste these as to stitch them. |
...and then by re-basting along the new line. This fabric is so thick and spongy that my pin heads were prone to vanishing right into it, or through it, so I didn't want to rely on them staying put for the adjustment.
 |
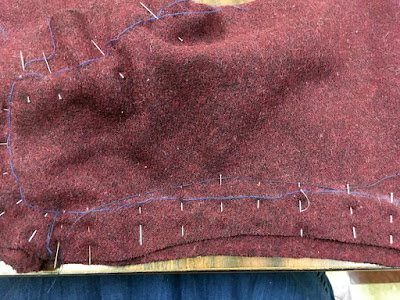
| Note the points are facing away from the foot. This is a crucial detail. |
There was a little bit of excess fabric to ease into the curve around the toes on the sole—you can see the ripples above—which wasn't precisely what I was going for, but does let the sole cup my foot, moving the seam just slightly off the ground. Long-term, I think that'll make these hosen last longer, so I didn't fuss about it too much.
 |
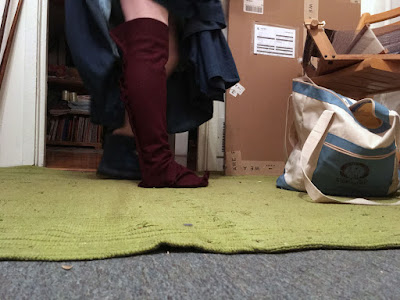
| No Cavalier boots in the 12th century. |
I used a small backstitch for all the construction seams, in navy blue thread because A. I had it and B. this fabric has a lovely blue undertone that means the right navy thread vanishes completely against the fabric. When I reached the top of the back seam, I pulled the hose on to check the fit and discovered there was really no need for the flare at the top, so I trimmed it away as I stitched.
 |
| A little lumpier than desired. Never mind the curled toe—that's the seam allowance. |
The ideal is for skin-tight hosen, but most people's feet are significantly larger in diameter than their ankles. Certainly mine are. Skin-tight at the ankle might be out, but I know I can do better than this. That giant wrinkle over my instep needs to go, too; not only is it unsightly, it'll rub inside a shoe.
 |
| Better. |
After a great deal of fiddling with the location of the instep seam, I managed to smooth the top of the foot and to slightly shrink the ankle bagging. Some looseness just can't be avoided without stretch fabric or lacing, neither of which I have in these hosen.
 |
| Clumsy pins, but they served their purpose. |
As you can see, the new seam line is well above the seam I marked from my cotton sheet mockup, which stretched and molded to my foot less readily than this wool does. Even the bubbling you can see above all but vanishes when I actually stitch the seam, and the slight tension of wearing the hose pulls the rest of the wrinkles out. It's really delightful.
 |
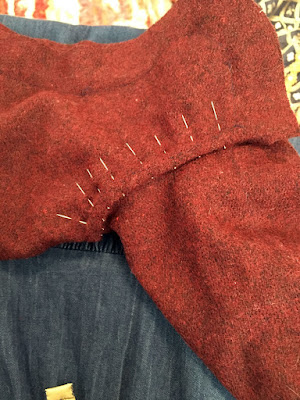
| Much neater. And more stabby. |
I carefully moved and repinned the seam to make a smoother line and to arrange the pins so I'd have half a chance of stitching the instep without stabbing myself.
No, really. Perpendicular pins result in fewer stabbings, which my poor stoic hands appreciate.
 |
| Two inches is like a mile in sock-making. |
I cleverly saved the trimmed-away pieces from the first instep adjustment to mark the (theoretical) new seam line on the second hose. Disregarding the one-inch seam allowance, there's still about two inches' difference in seam location, and the arch over the high point of my instep is much lower than my pattern demands.
Unfortunately, just pinning the "correct" seam line didn't give me a well-fitted hose. (Actually, it didn't even give me a wearable hose. I couldn't get the adjusted seam lines to meet at all points, even though that's exactly what they'd done on the first hose.) I ended up constructing the second hose
except for the instep seam, and pinning the adjustment on my foot.
Yes, it matched what I'd marked from the first hose. No, I have no idea why the extra fitting step was necessary. Maybe the sewing gods were hungry and wanted a sacrifice of time.
 |
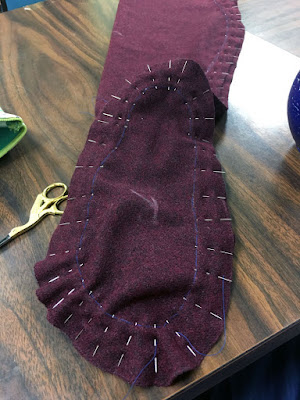
| I just love long neat rows of pins, okay? |
I trimmed and finished one seam at a time, starting with the
ostensibly easiest: the back seam. It's just a long seam, no big deal...except for the fairly strong curves to fit my calves. Those were a bit challenging to wheedle into place without doing any actual notching or slashing, but patience and lots of pins eventually won out.
 |
| Also weird eldritch non-Euclidean rows of pins. |
The instep seam actually happened next, but I didn't get a photo of it for this hose. Also, there's a reason for this: by finishing the vertical and verticoid seams first, I could enclose their raw edges butting against the sole seam in the finish for that seam. Et voila, no raw edges anywhere, of any length! Very valuable in high-wear garments like hosen.
 |
| Flat-felling with thick fabric is...intriguing. |
I pinned the daylights out of the seams as I finished them, running pins just through the top layer of the sandwiched edges and into the body of the hose. As always, everything's anchored with a slip stitch.
 |
| That is not even close to the true color of this fabric. |
After all the fussing with getting the instep seam in the right place, finishing it went very smoothly.
 |
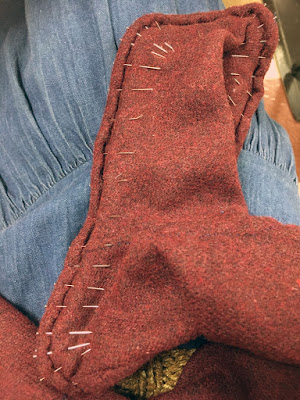
| I spent five minutes getting weird looks in the break room for this shot. Appreciate the artfully arranged sock. |
At the very last, I decided to go ahead and finish the top edges, too, even though they're exactly on the bias and this wool never even tried to fray on me. I flipped the hosen right side out (that's why they look fuzzier suddenly), folded down about half an inch twice, and slip stitched the hem into place.


Comments
Post a Comment