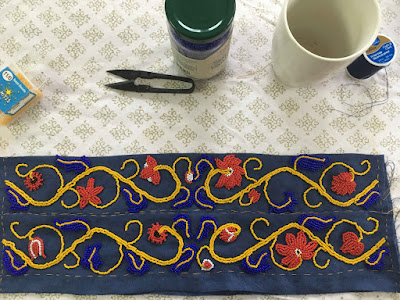
I have several yards of mustard "wool" (it's probably a high-polyester or nylon blend, but it looks quite close) I've been meaning to make into a practical work dress for nearly two years, and at last I think I'm ready to construct it. Of course, I can't stand to make anything simple, so it's getting beaded cuffs and a collar to match—if I want to work in it, I'll just roll up my sleeves
and probably pin them because beads are heavy.
 |
| Preliminary design, being transferred to linen. |
First thing was to draw out a pattern, with notes about beading direction and ideas for flower designs. I started freehanding pretty fast...it was just too stressful trying to match the drawing exactly. I pricked the design at endpoints and branches, then used a fine Sharpie to connect the dots, checking my work against the pattern as I went.
The yellow stitching in these photos marks the design area—I wanted the blue cuffs to enclose the dress cuffs, so the fabric is slightly more than twice as wide as the beaded design, with a bit extra to allow for seaming and edge finishing.
 |
| SCREAMING NEON. |
Starting the beading! I used all glass seed beads, in colors as close to
extant 12th/
13th century beading as I could find (the yellow beads are probably the furthest from true, but they're not screaming neon like they appear above). In that period, it appears coral beads were used for red, gold for yellow, and seed pearls for white. Green seems relatively uncommon, but when it appears, is done in glass like the blue beads. Everything is couched work, and despite my best efforts, I often had just one bead too many for the length I was covering, and got little wobbles and bumps in my nice smooth vines.
Laziness Perseverance won, and with the weight of the rest of the beads, many of the smaller wrinkles fixed themselves.
 |
| Finished! And the colors are all pretty true in this photo. |
I had fun inventing new flower shapes, trying not to make perfectly symmetrical designs—I've noticed in many medieval decorative arts there's a symmetry of
balance, but not of
design, and I think I achieved that effect reasonably well.
 |
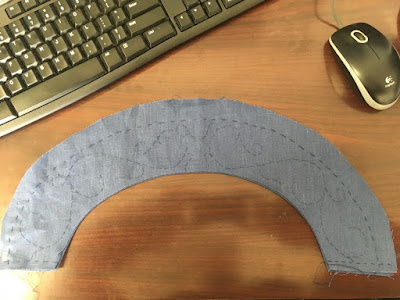
| The only problem with drawing the design on the wrong side of the fabric is that you can't see it. |
For the collar, I modified the design just a little to accommodate the curve of the pieces, and stitched fronts and backs together at what would become the neck edge before I began beading. Of course, my usual trouble with inverting pieces asserted itself, and I ended by drawing the design on the wrong side of the fabric.
Sigh. Rather than draw it out again, I decided on a loose running stitch along the main lines, which also allowed me to pull the guidelines out after beading, if my final design deviated enough to leave them visible.
 |
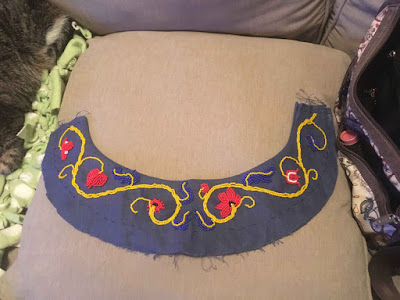
| The halfway point, with partial Chirpy Cat cameo. |
I used the same flowers I'd developed on the cuffs for the collar, and ended by adding a few leaves where the negative space got a bit overwhelming on the outer curve.
 |
| Finished! |
I waited to connect the vines running across seam lines until after I'd seamed the front and back pieces of the collar together, to avoid having bold lines of pattern that didn't
quite match. That's the sort of thing that drives me crazy. The only thing left to do after this photo is piercing and binding eyelets at the back edges for lacing.


Comments
Post a Comment